Google Stadia recently came out and one of the interesting things about it is that it streams games from the cloud to your devices. I had previously built a gaming PC around 10 years ago with an Nvidia GTX 260 and an Intel Core i5-750 (eventually upgraded to Nvidia 750 Ti). I hadn’t used the PC in a while and my experiments with setting up VSCode on AWS got me thinking about setting up my own Gaming server on AWS too. Since this was an ideal use case for the cloud (an on demand machine that I use infrequently and will be consistently upgraded with the most recent GPUs), I wanted to see how I could setup a Windows PC on the AWS to play my Steam games.
Why would you want this?
I don’t usually use a PC for work or personal use (have a MacBook Pro for both) and I didn’t want to deal with purchasing expensive new GPUs or building a brand new PC. One of my overall visions for the future of computing is using thin(er) clients to connect to personalized workspaces in the cloud for all kinds of computing needs (Development work, Gaming, a different operating system when you need it). Amazon came out with Amazon Workspaces for this reason (and for enterprise management of data and apps in those workspaces), but their pricing for individuals is insane (as of this writing $735 per month or $22 + $1.75/hr for their minimal 8 vCPU, 15GB memory, 4GB GPU Memory machines). I thought that I could do better by using AWS directly with VMs. With this setup, I can get continuous hardware updates as AWS upgrades their machines, and I can stream my already purchased Steam games to my Mac, iPad, or iPhone.
What GPU machines are available on AWS and Pricing
AWS is always upgrading their machines, so as of January 1st, 2020 - their cheapest current instance with a GPU is a g4dn.xlarge - a VM with 4 vCPUs, 16GB memory, and an hourly price of $0.526/hr on demand. Spot prices are currently only $0.19/hr (not including bandwidth or EBS Disk space).
These machines actually use Nvidia T4 GPUs, which are current generation GPUs built primarily for Cloud Providers. They’re about 1/2 as powerful as the current top of the line 2080 Ti in compute, but have more graphics memory since they’re mainly used for professional scientific computing (specifically Machine Learning use cases).
Operating System and Specs
For this guide, we’ll be setting up a g4dn.xlarge with Windows Server 2019. After using Remote Desktop to authenticate to the server, we’ll download Nvidia drivers, setup some common applications we need and get Steam Link working.
Guide
Get an AWS Windows VM
- Login to your AWS Console and start a new Windows Instance (On Demand) with a g4dn.xlarge VM. Add a 128GB EBS Drive to the machine as well.

Choose the Windows Server 2019 AMI with a g4dn vm.


Add a 128GB volume (or more) as your root volume. Feel free to resize to whatever size you need for your games. Note that since the vm is on AWS, steam downloads will generally be extremely fast (50MB/s +), so you could even get a smaller drive and just delete items as needed.

When adding a security group, make sure to make the following ports open along with TCP 22 for SSH:


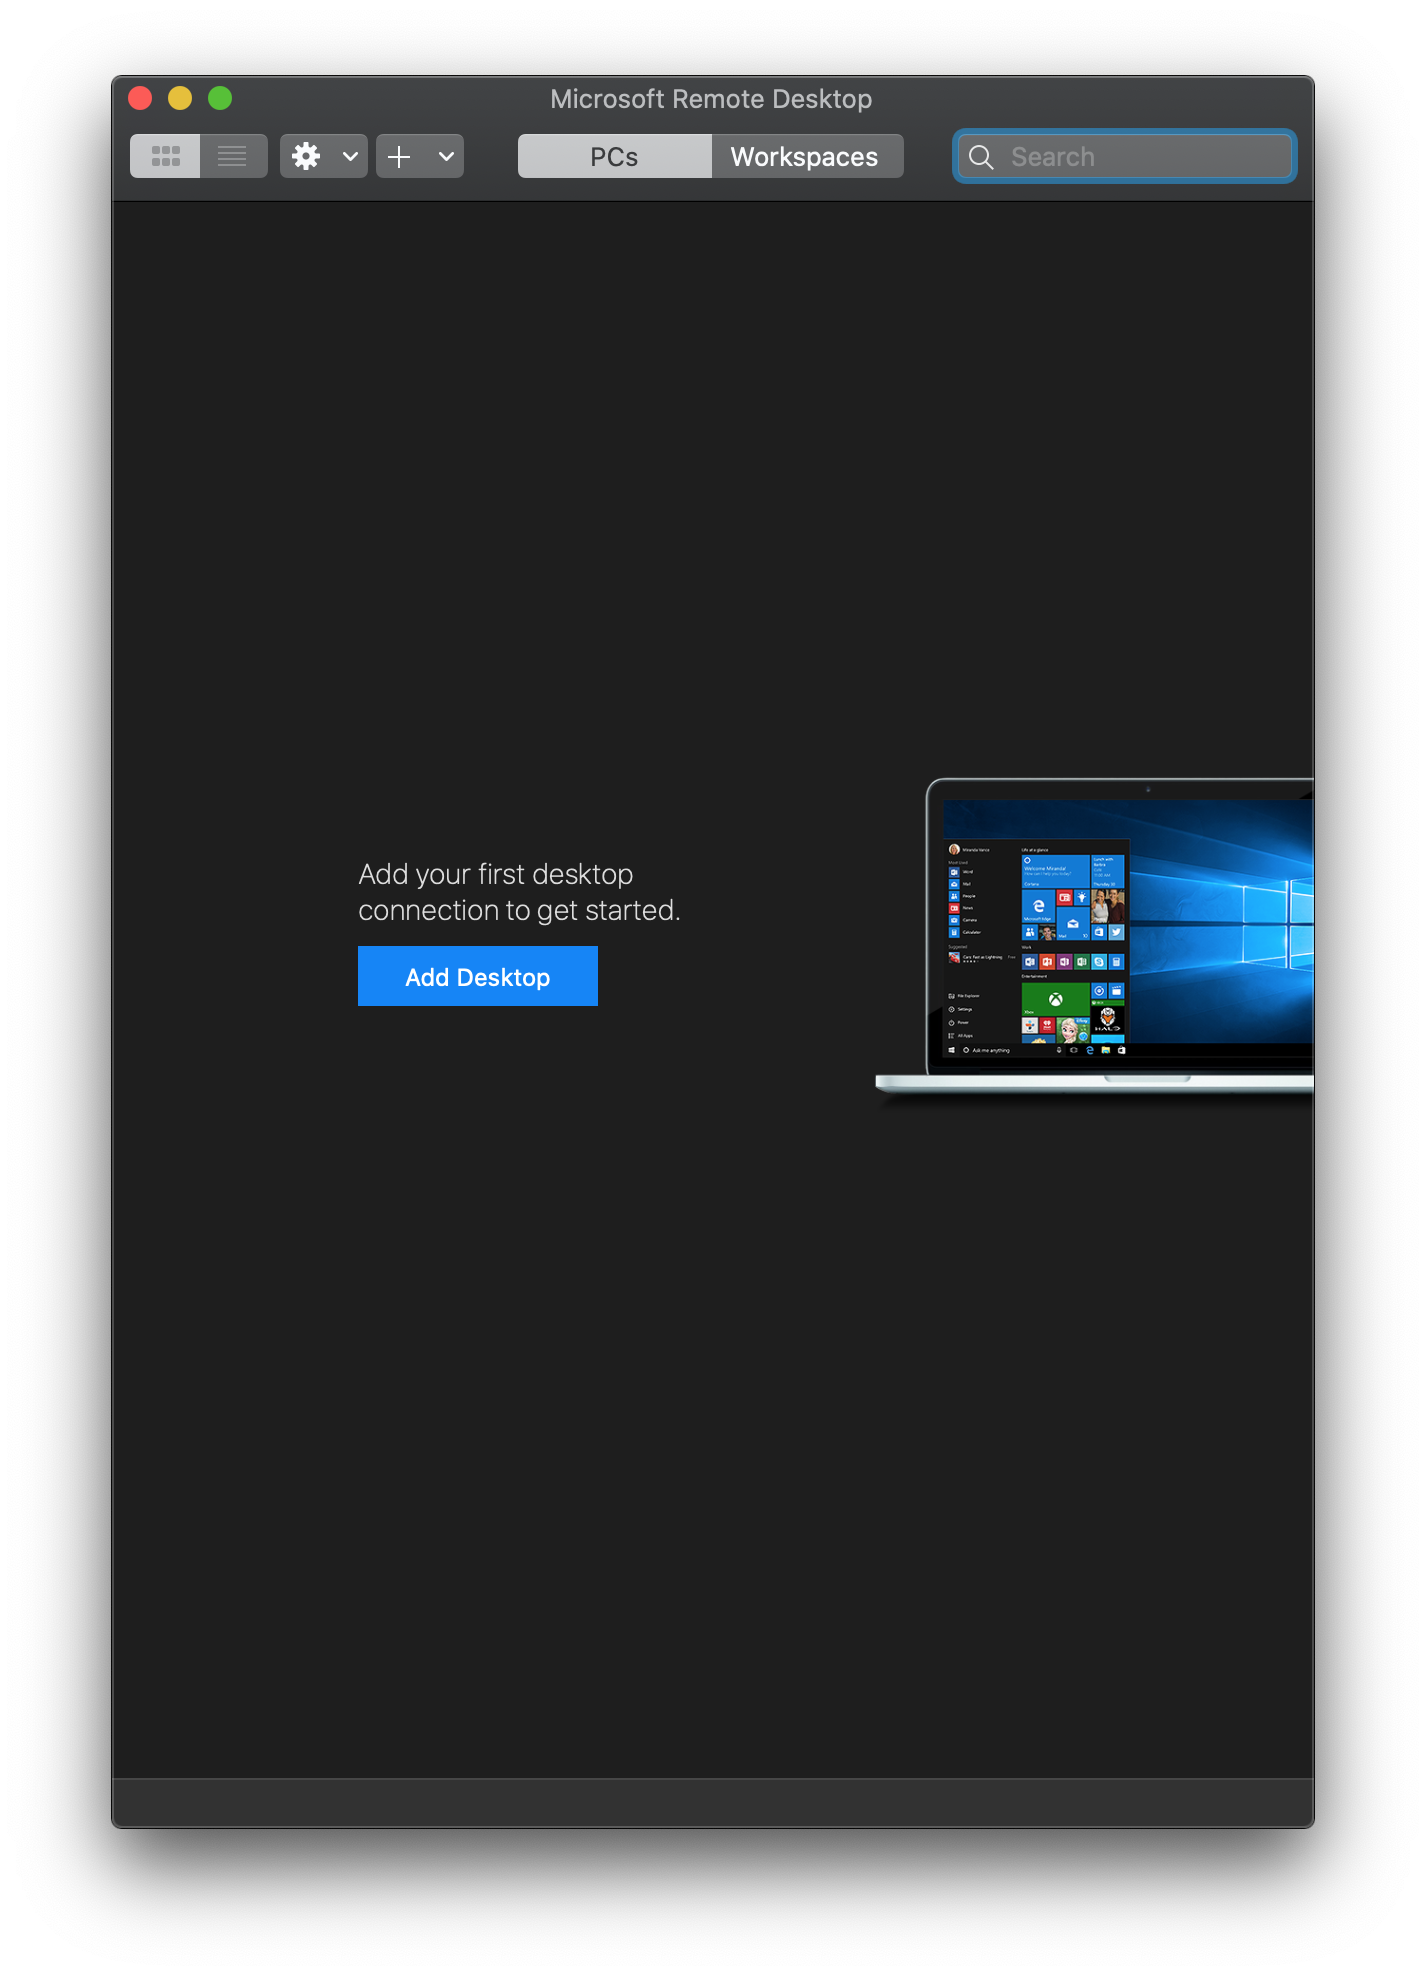
When you launch the instance, you want to click on it in the AWS UI and use the “Connect” button to get Remote Desktop connection and password information.


Connect using your remote desktop client and get the password from the AWS connect modal.
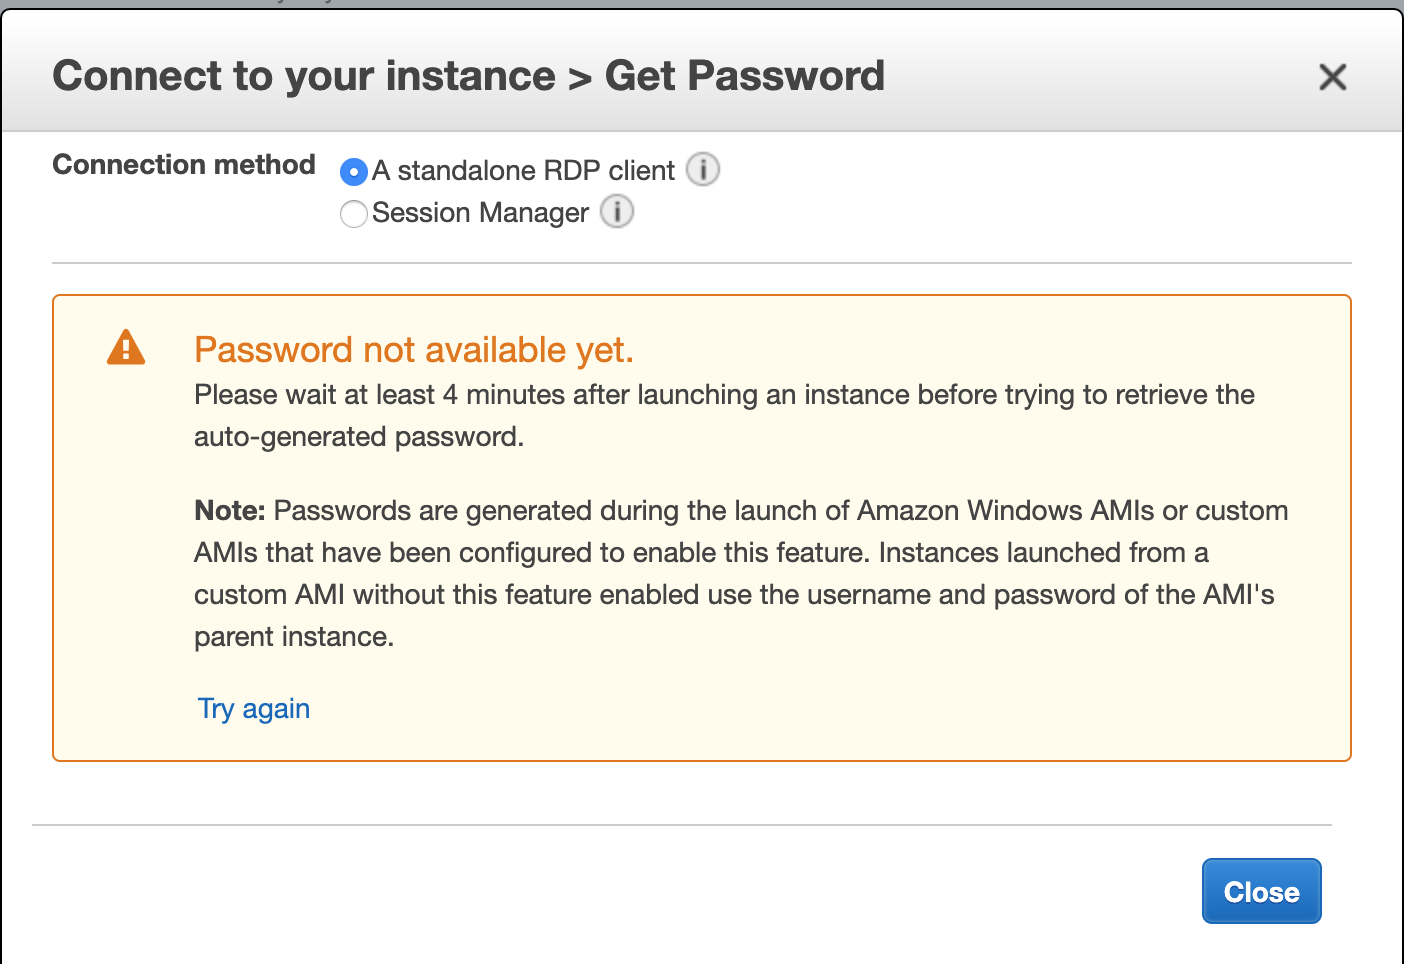
Note that if you see this error message when retrieving your password, you usually just need to wait a few minutes while the VM is initializing.
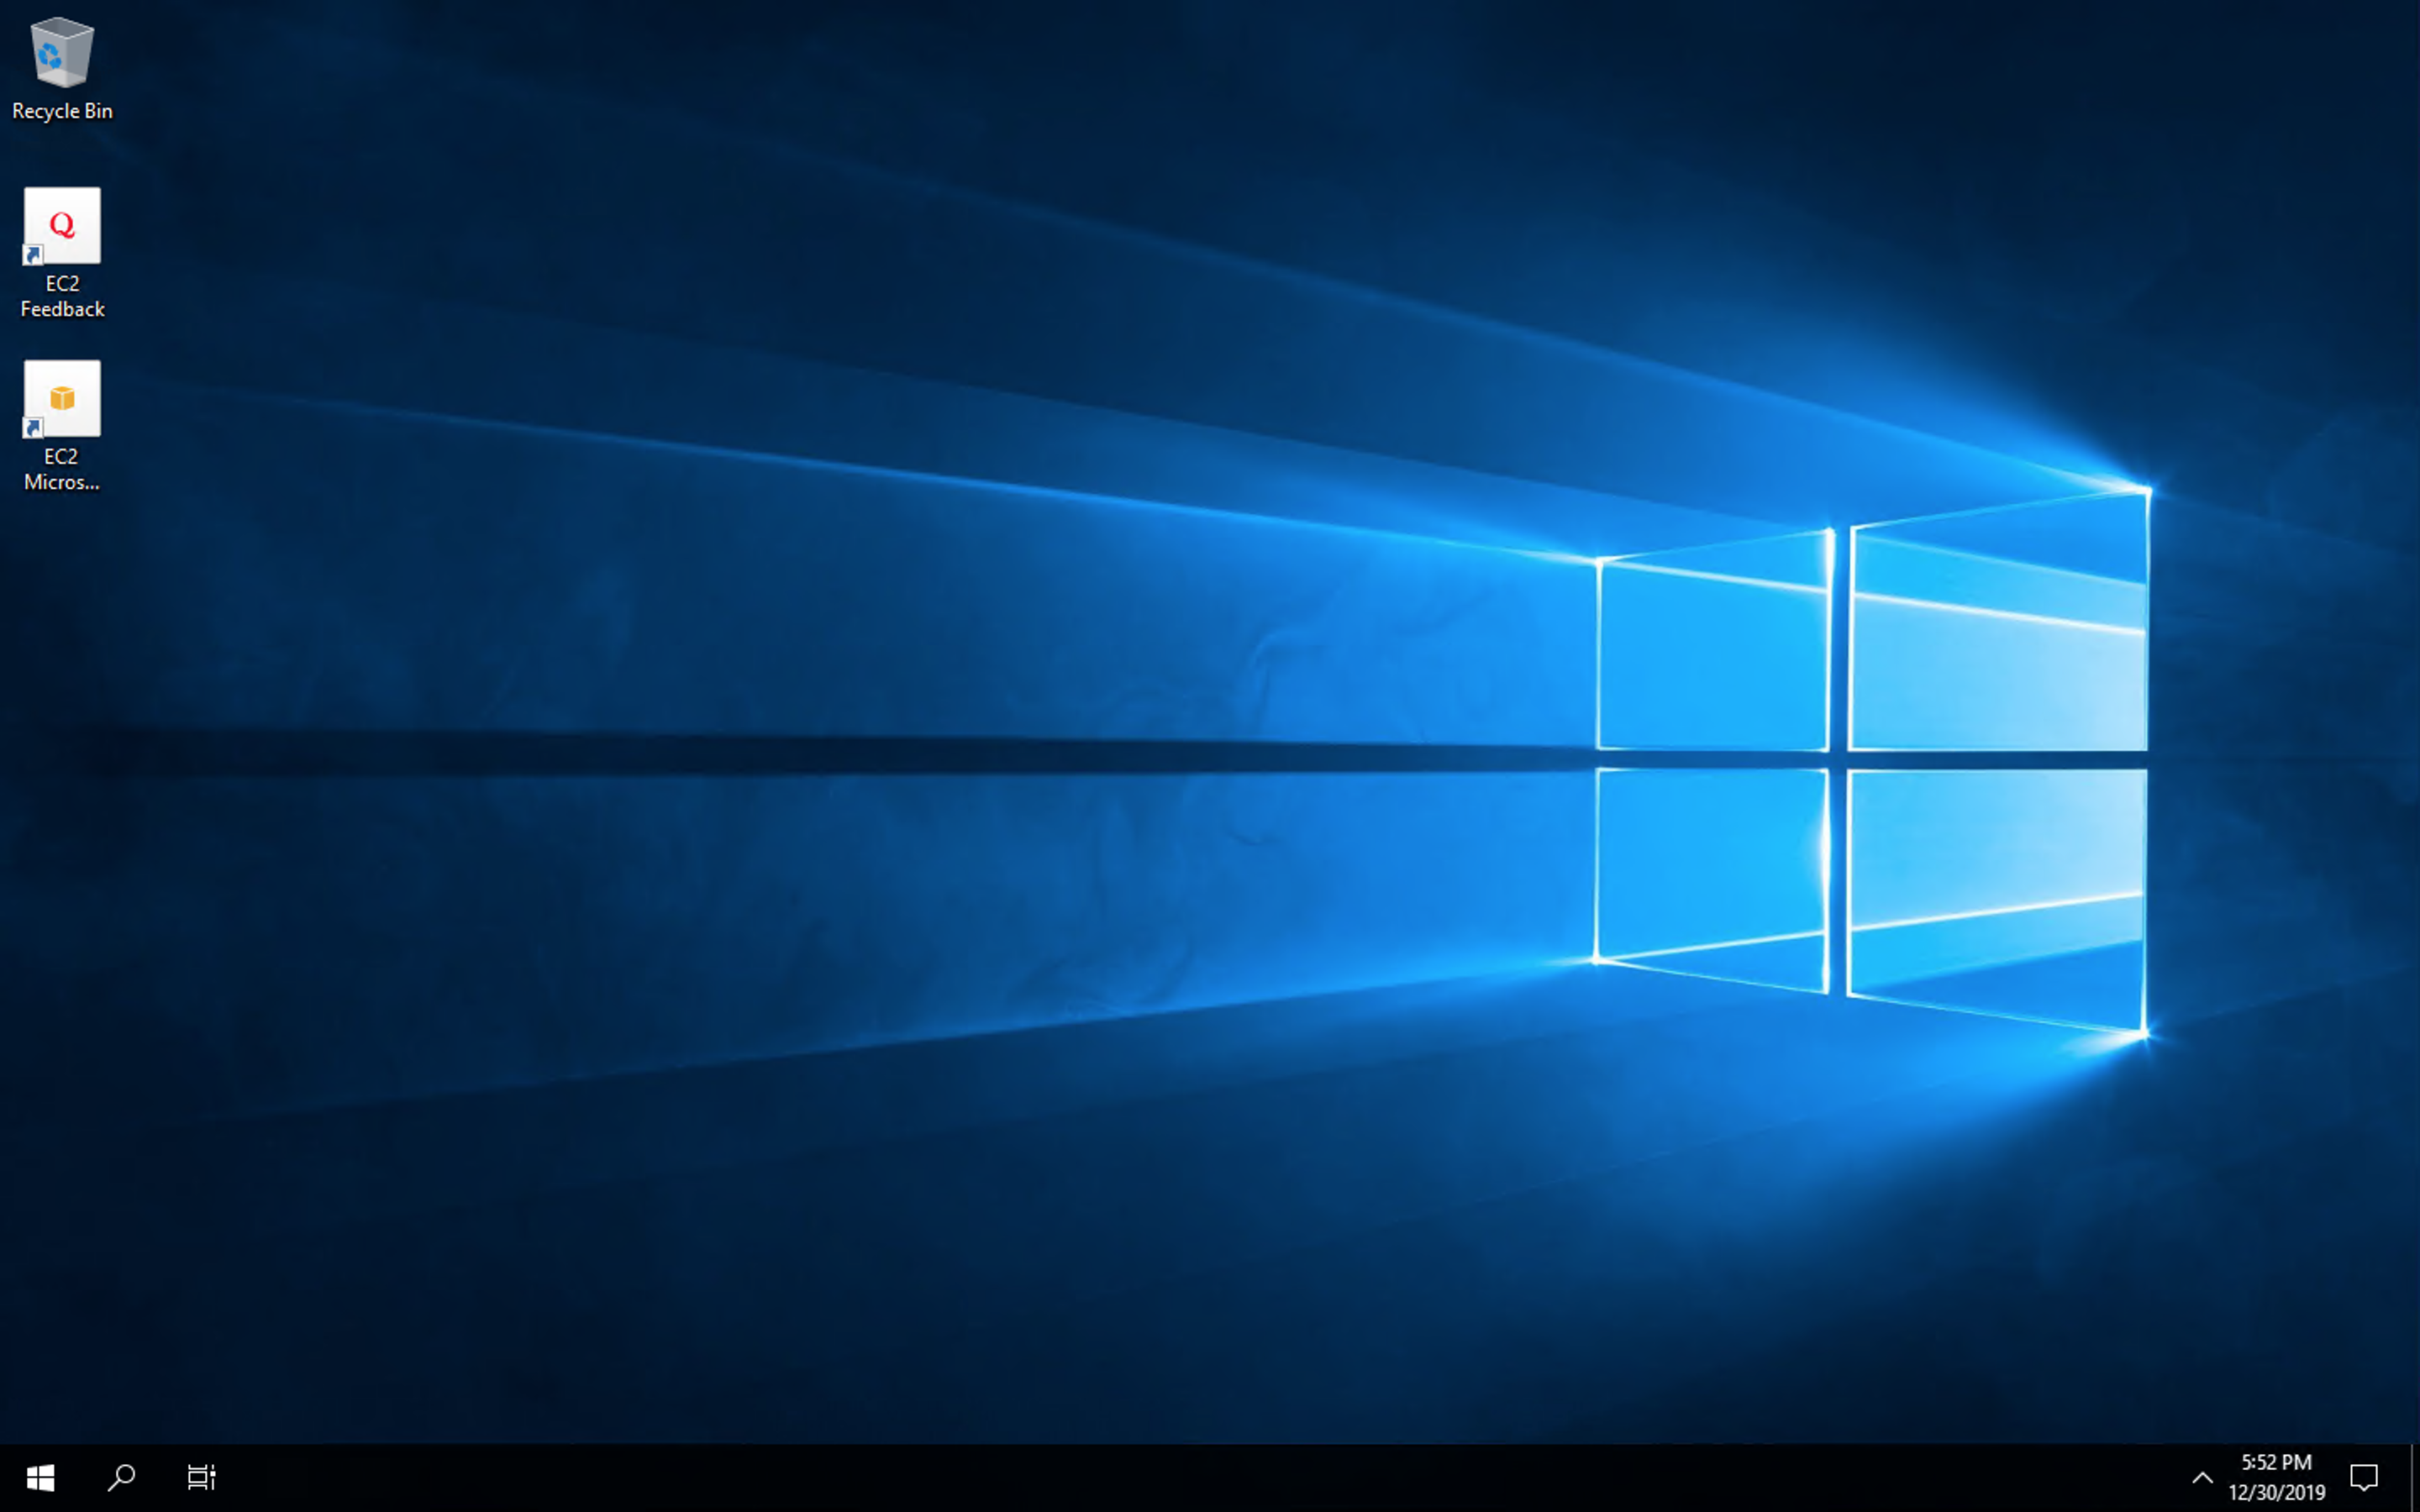
Once you’ve connected via Remote desktop to your Windows Machine, you should see a virtual desktop
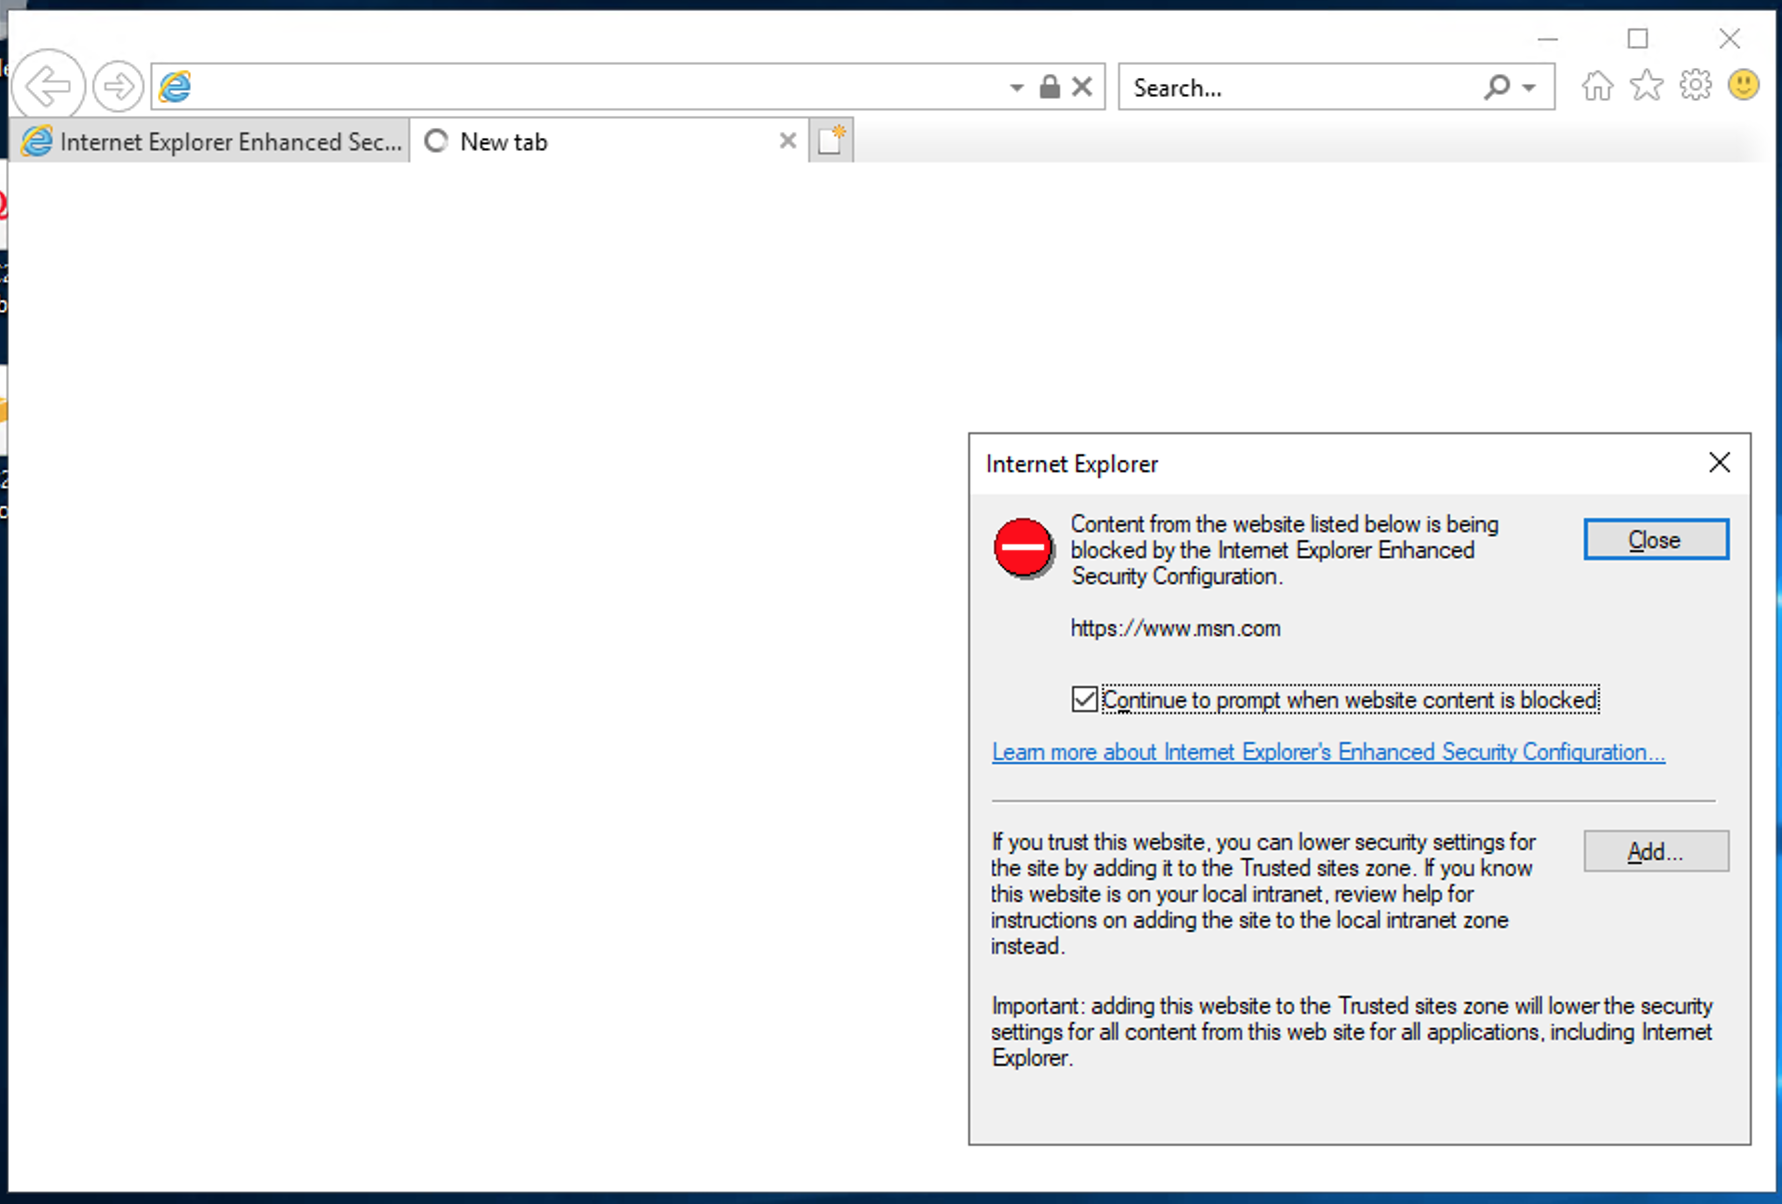
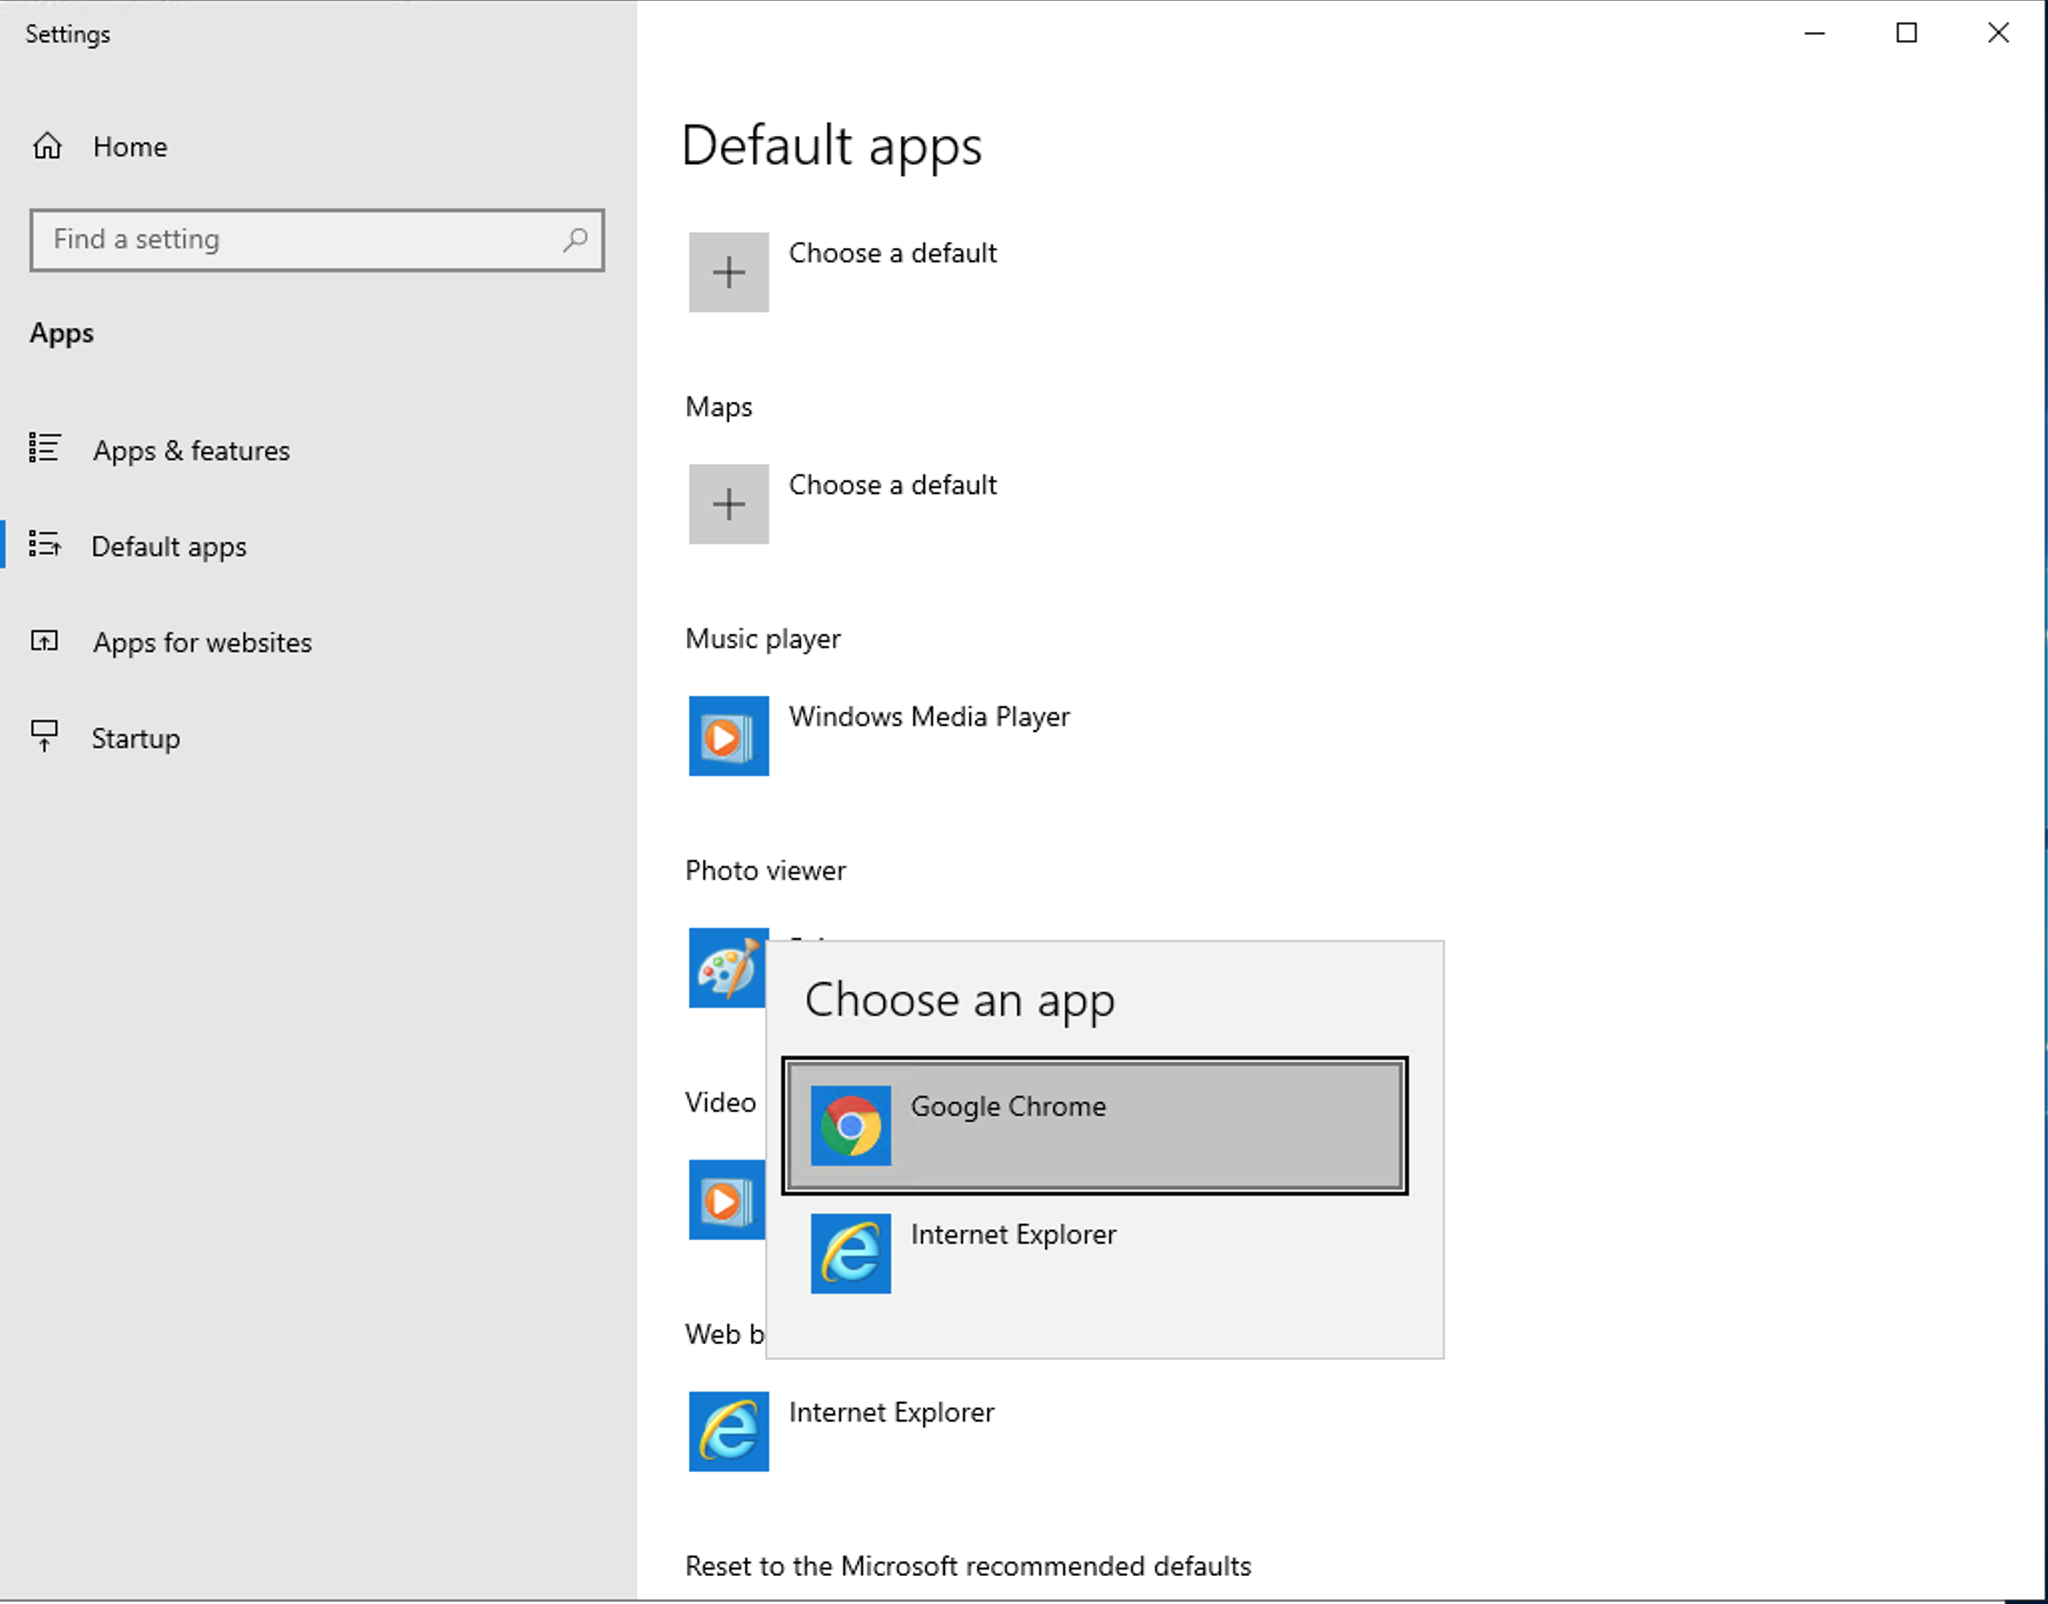
Disable IE Restrictions and get Chrome
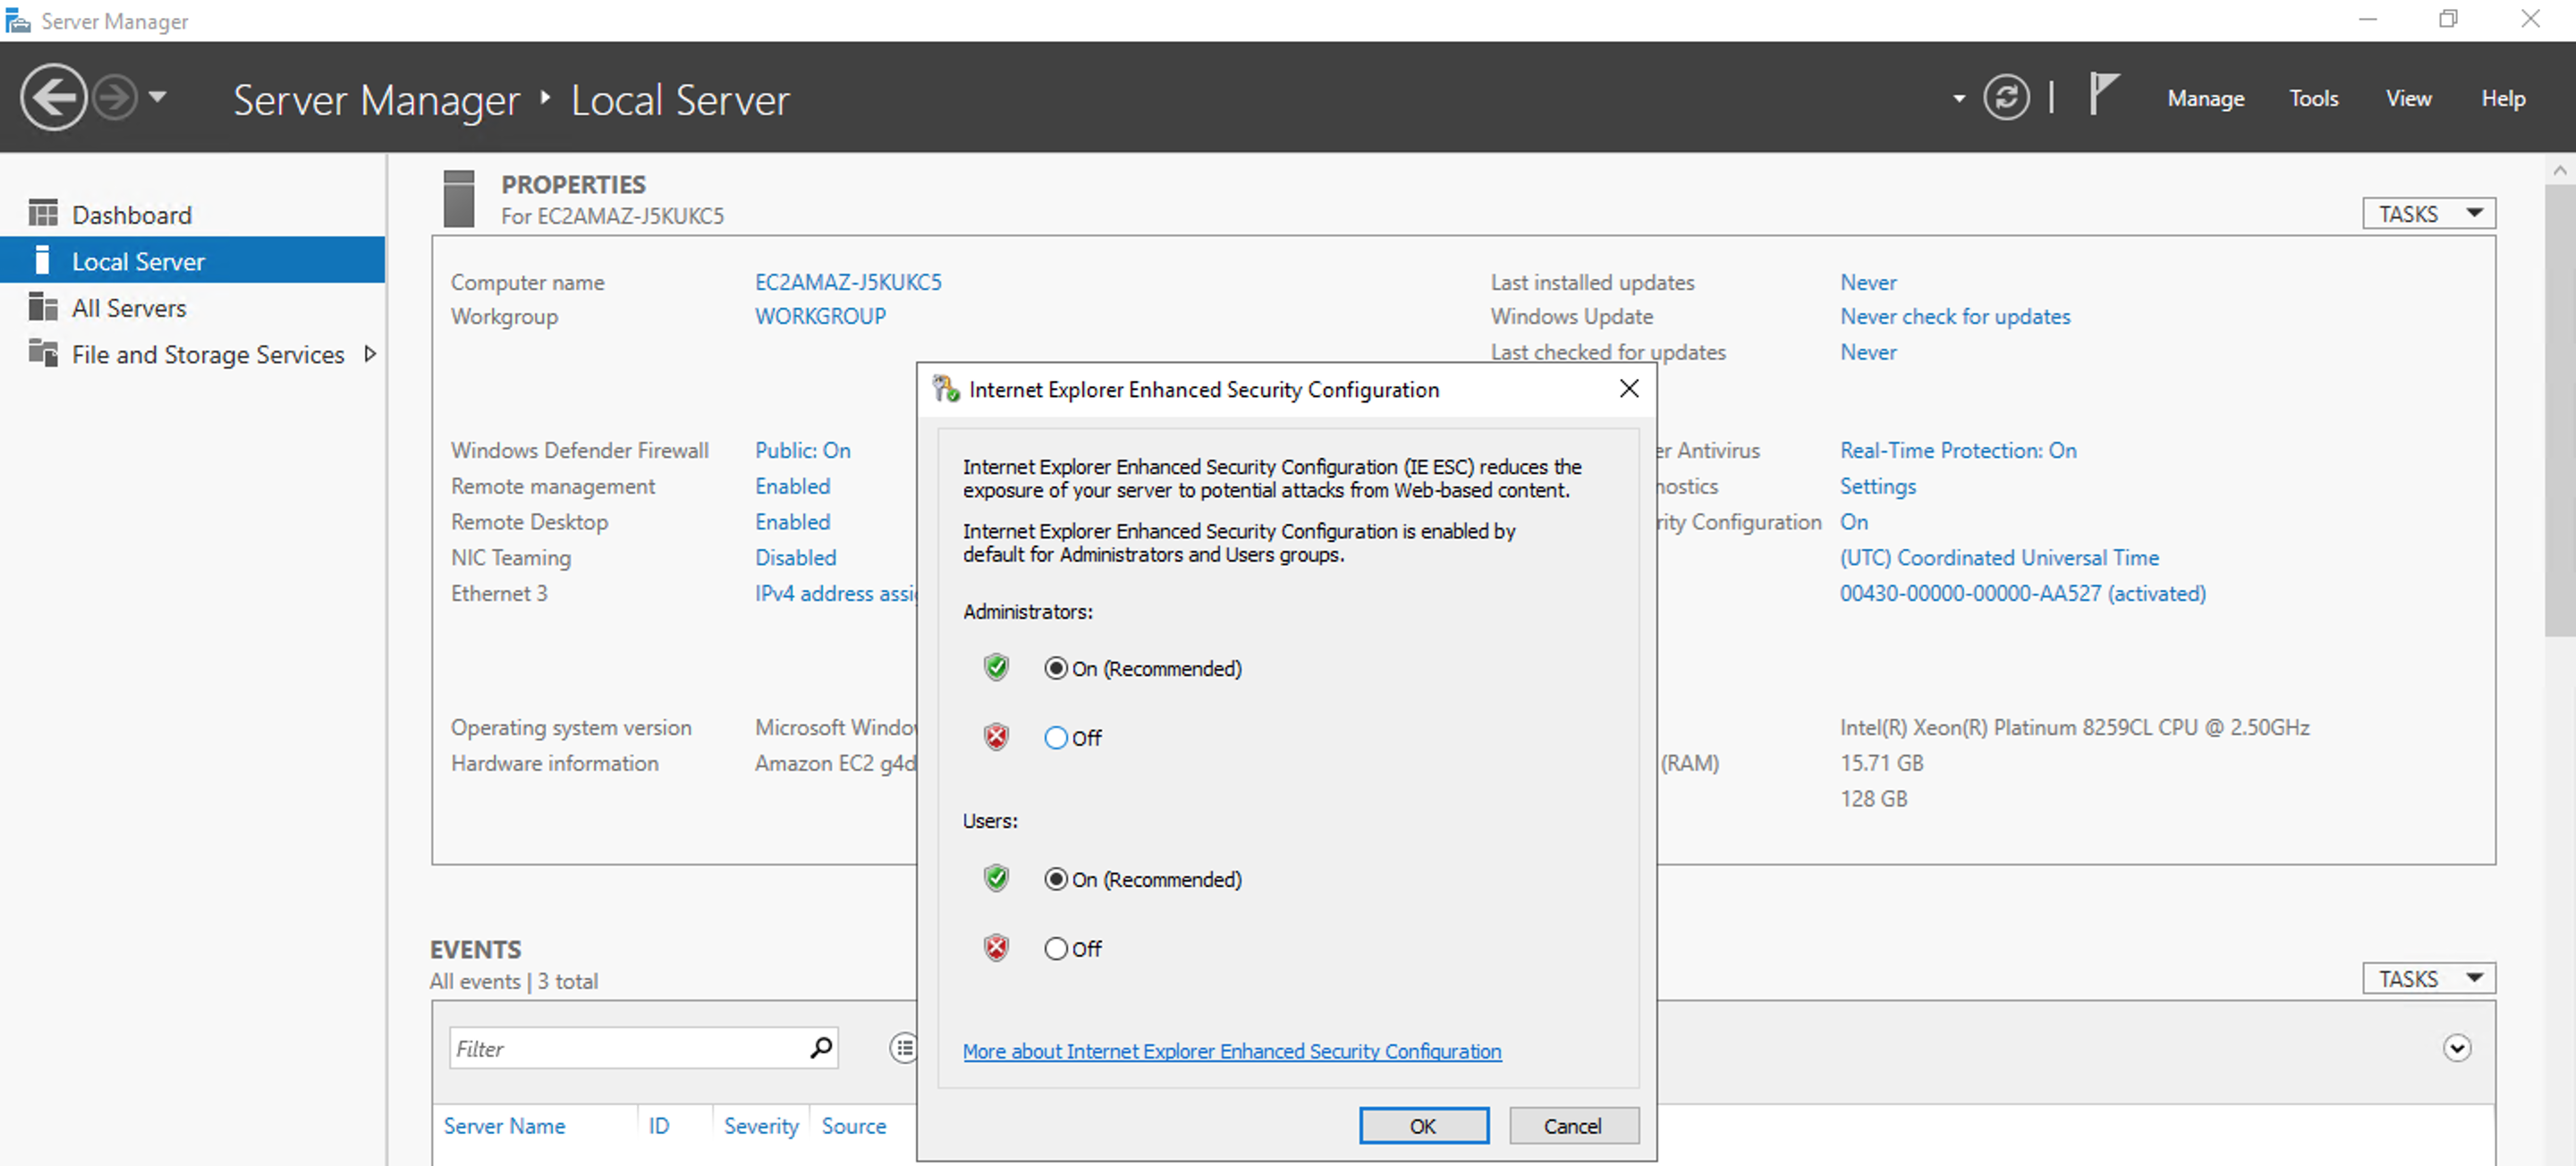
IE on Windows Server has some insane restrictions on website content and downloads. Open IE the first time and make sure to disable “Internet Explorer Enhanced Security Configuration” in Server Manager settings in order to download Chrome and set it up as your default browser.
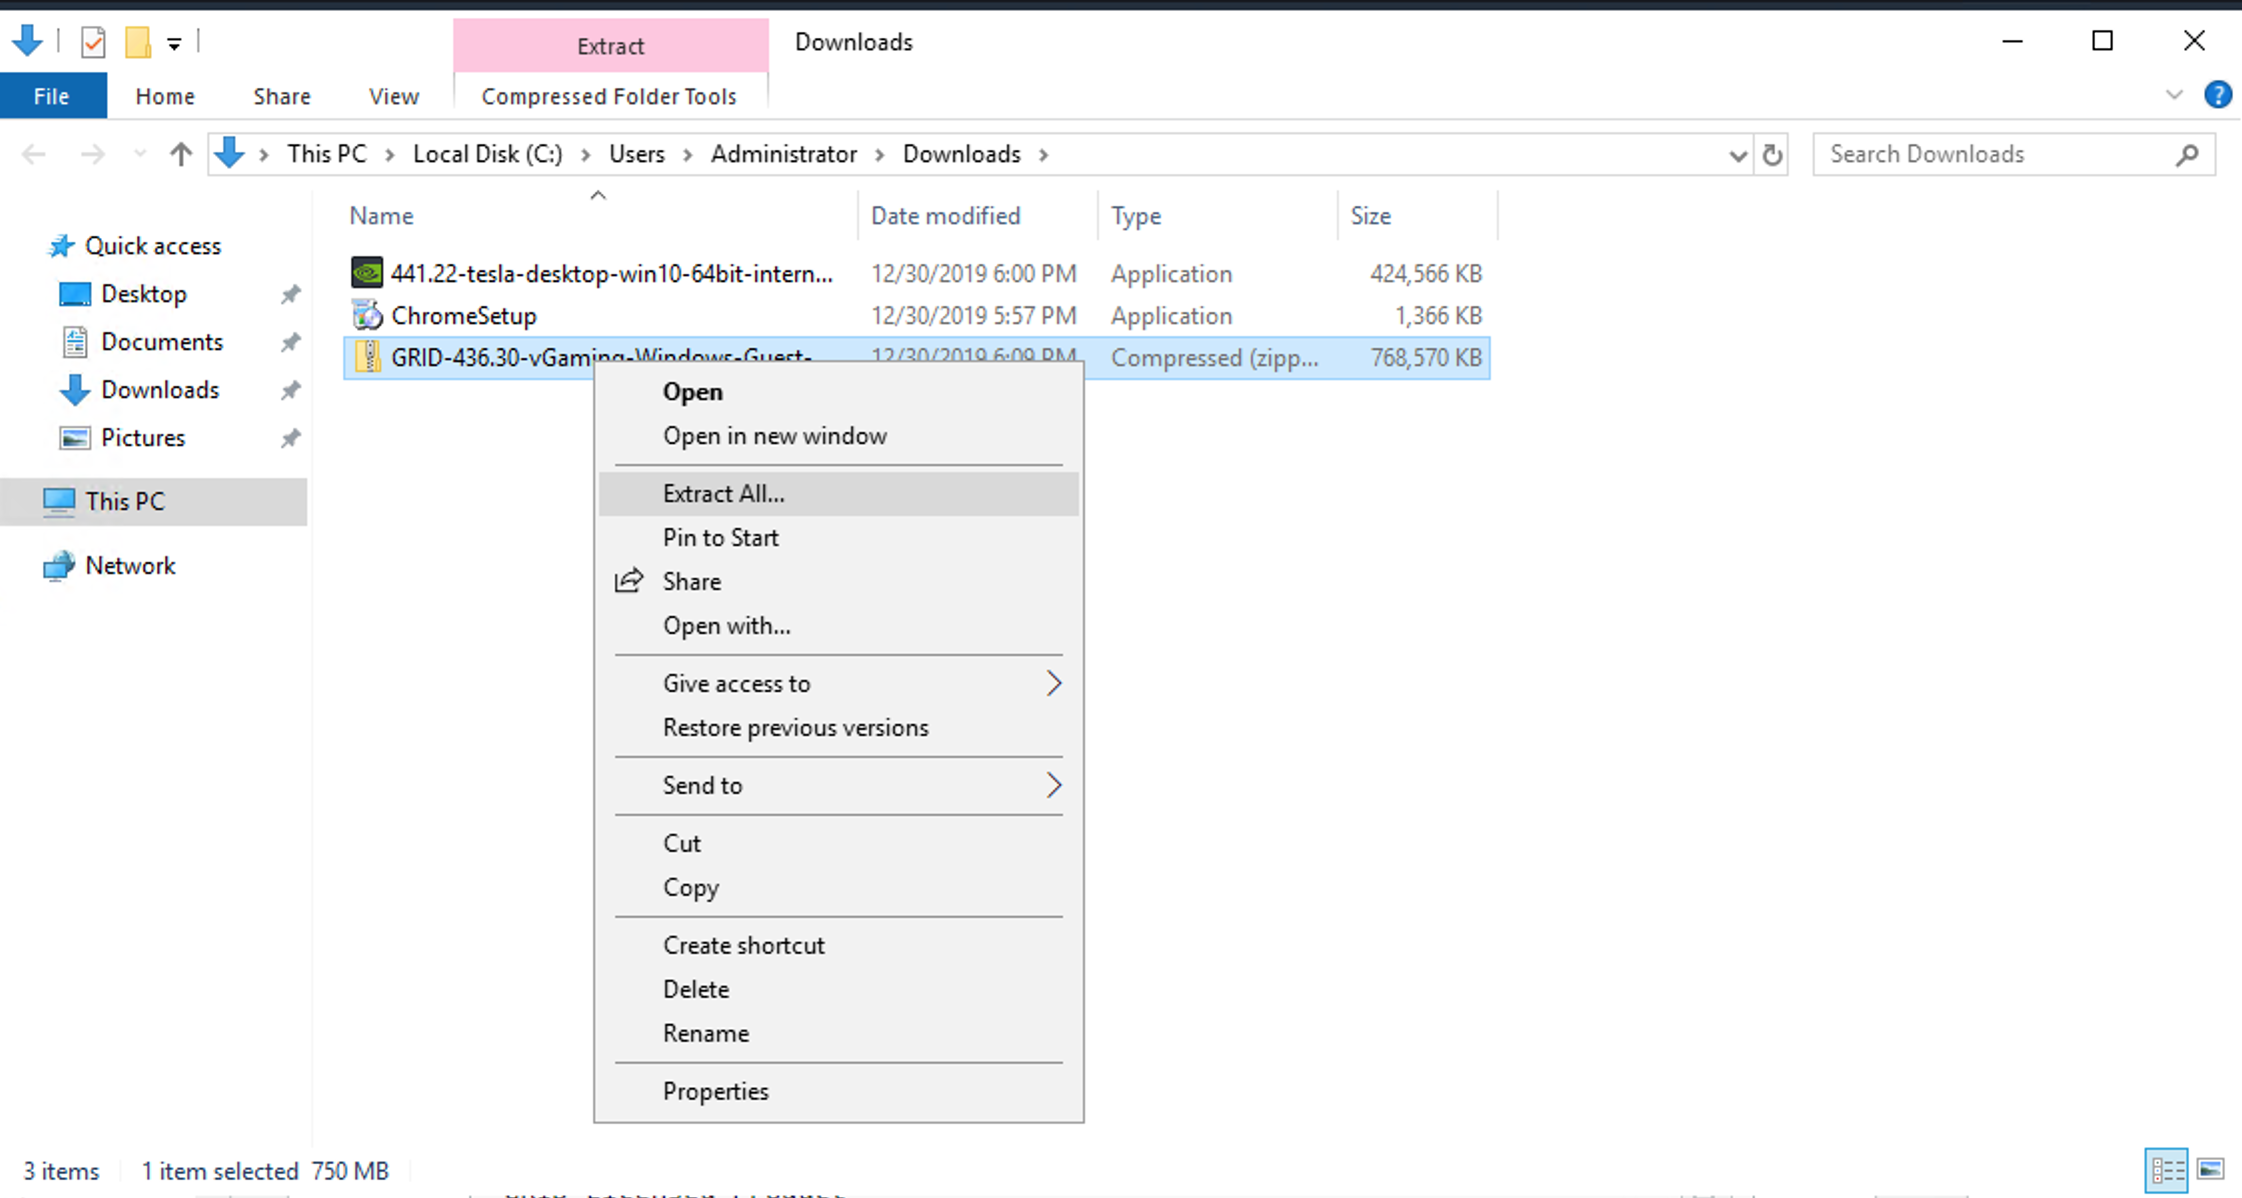
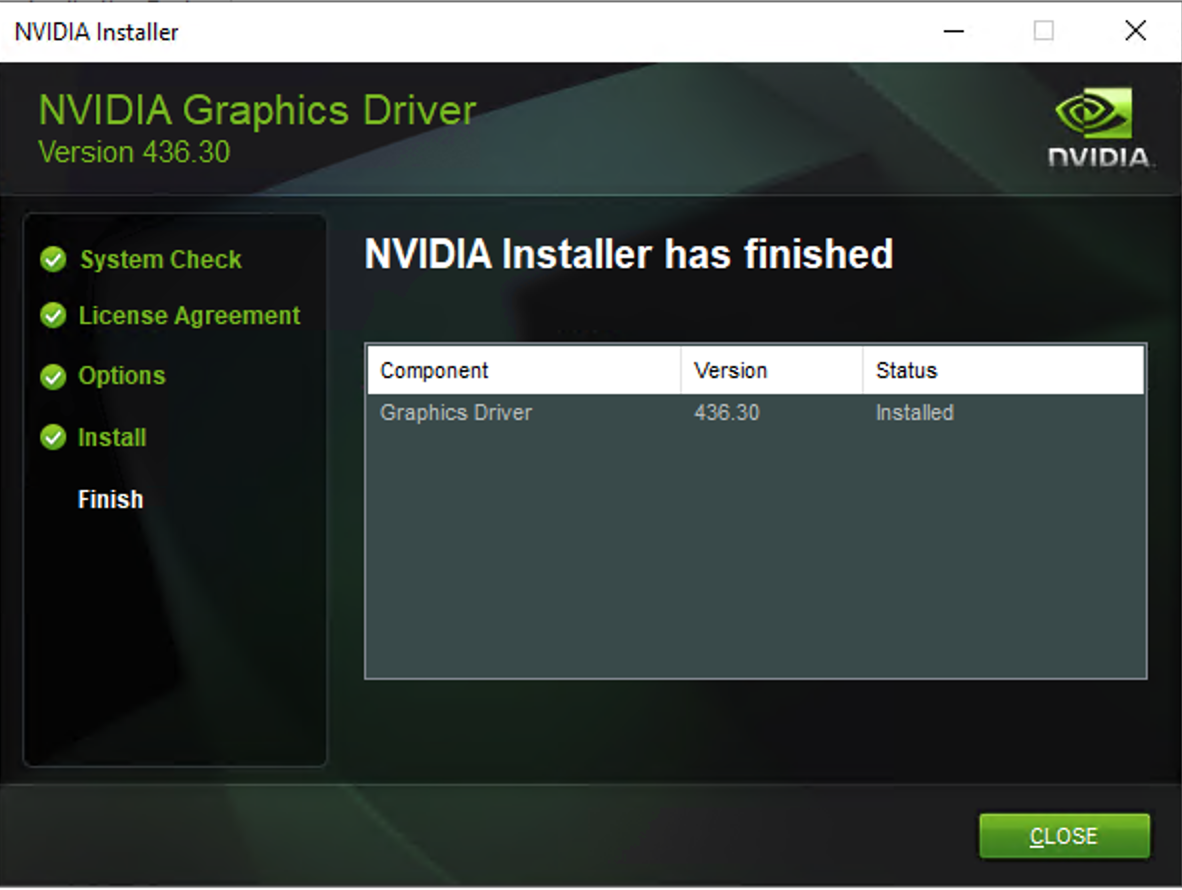
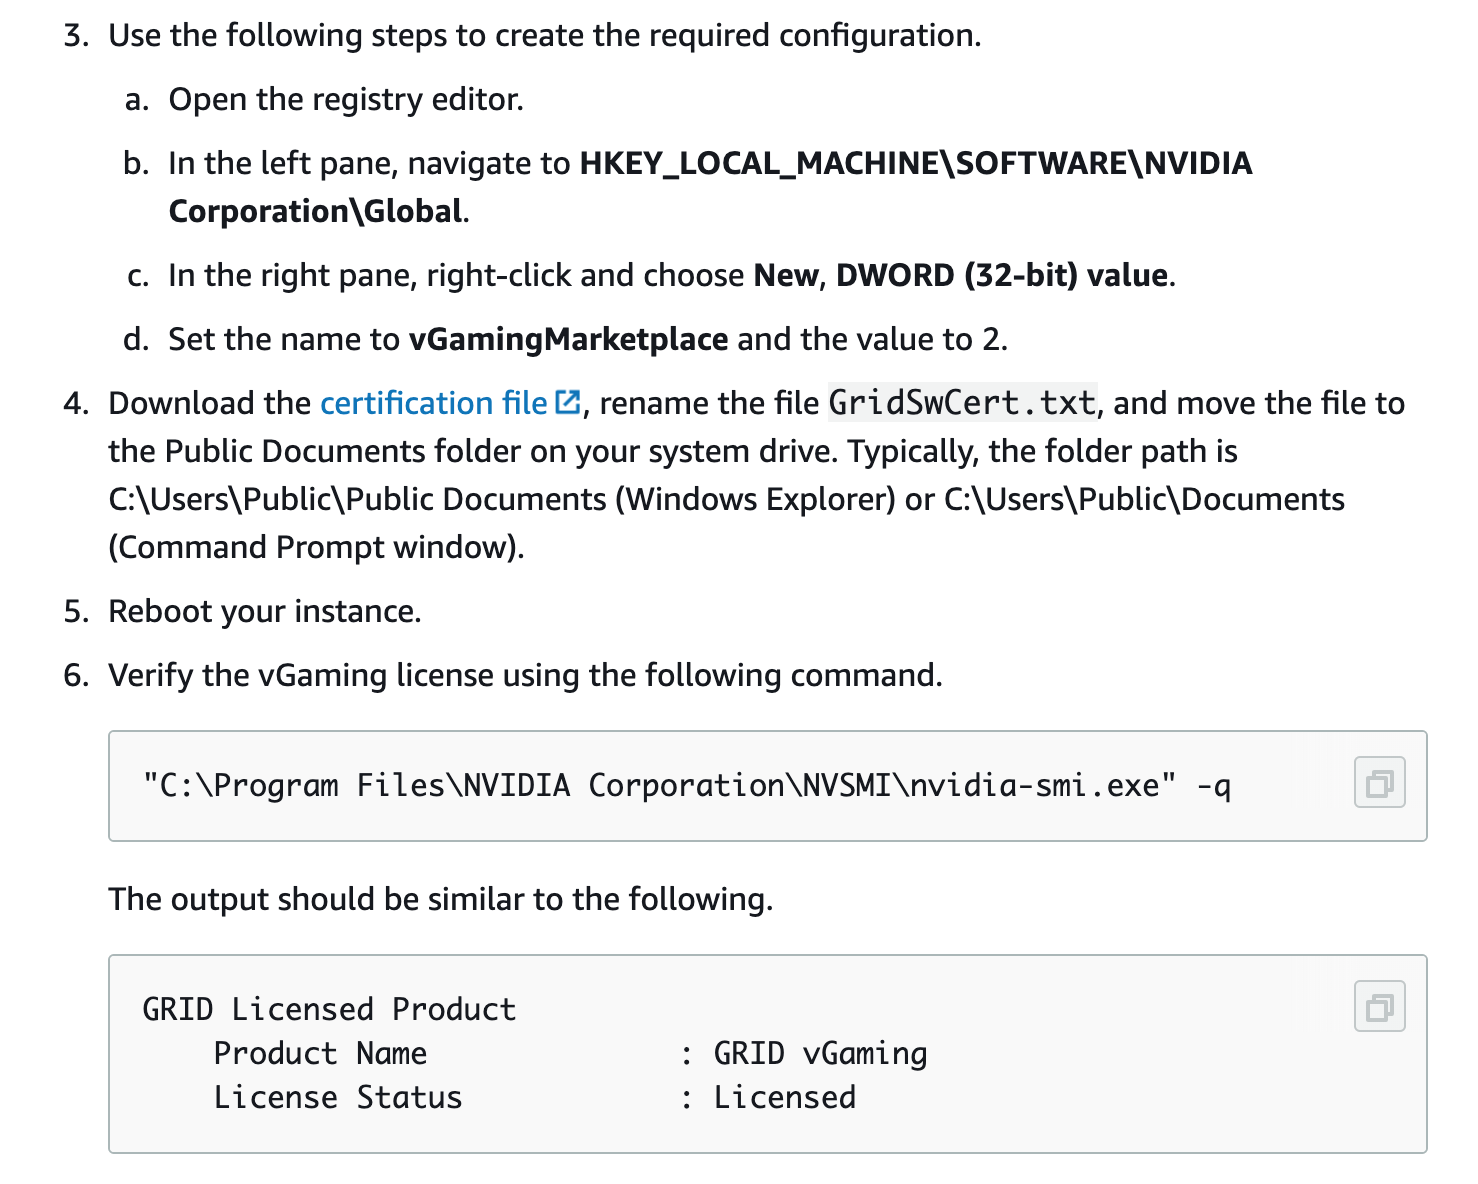
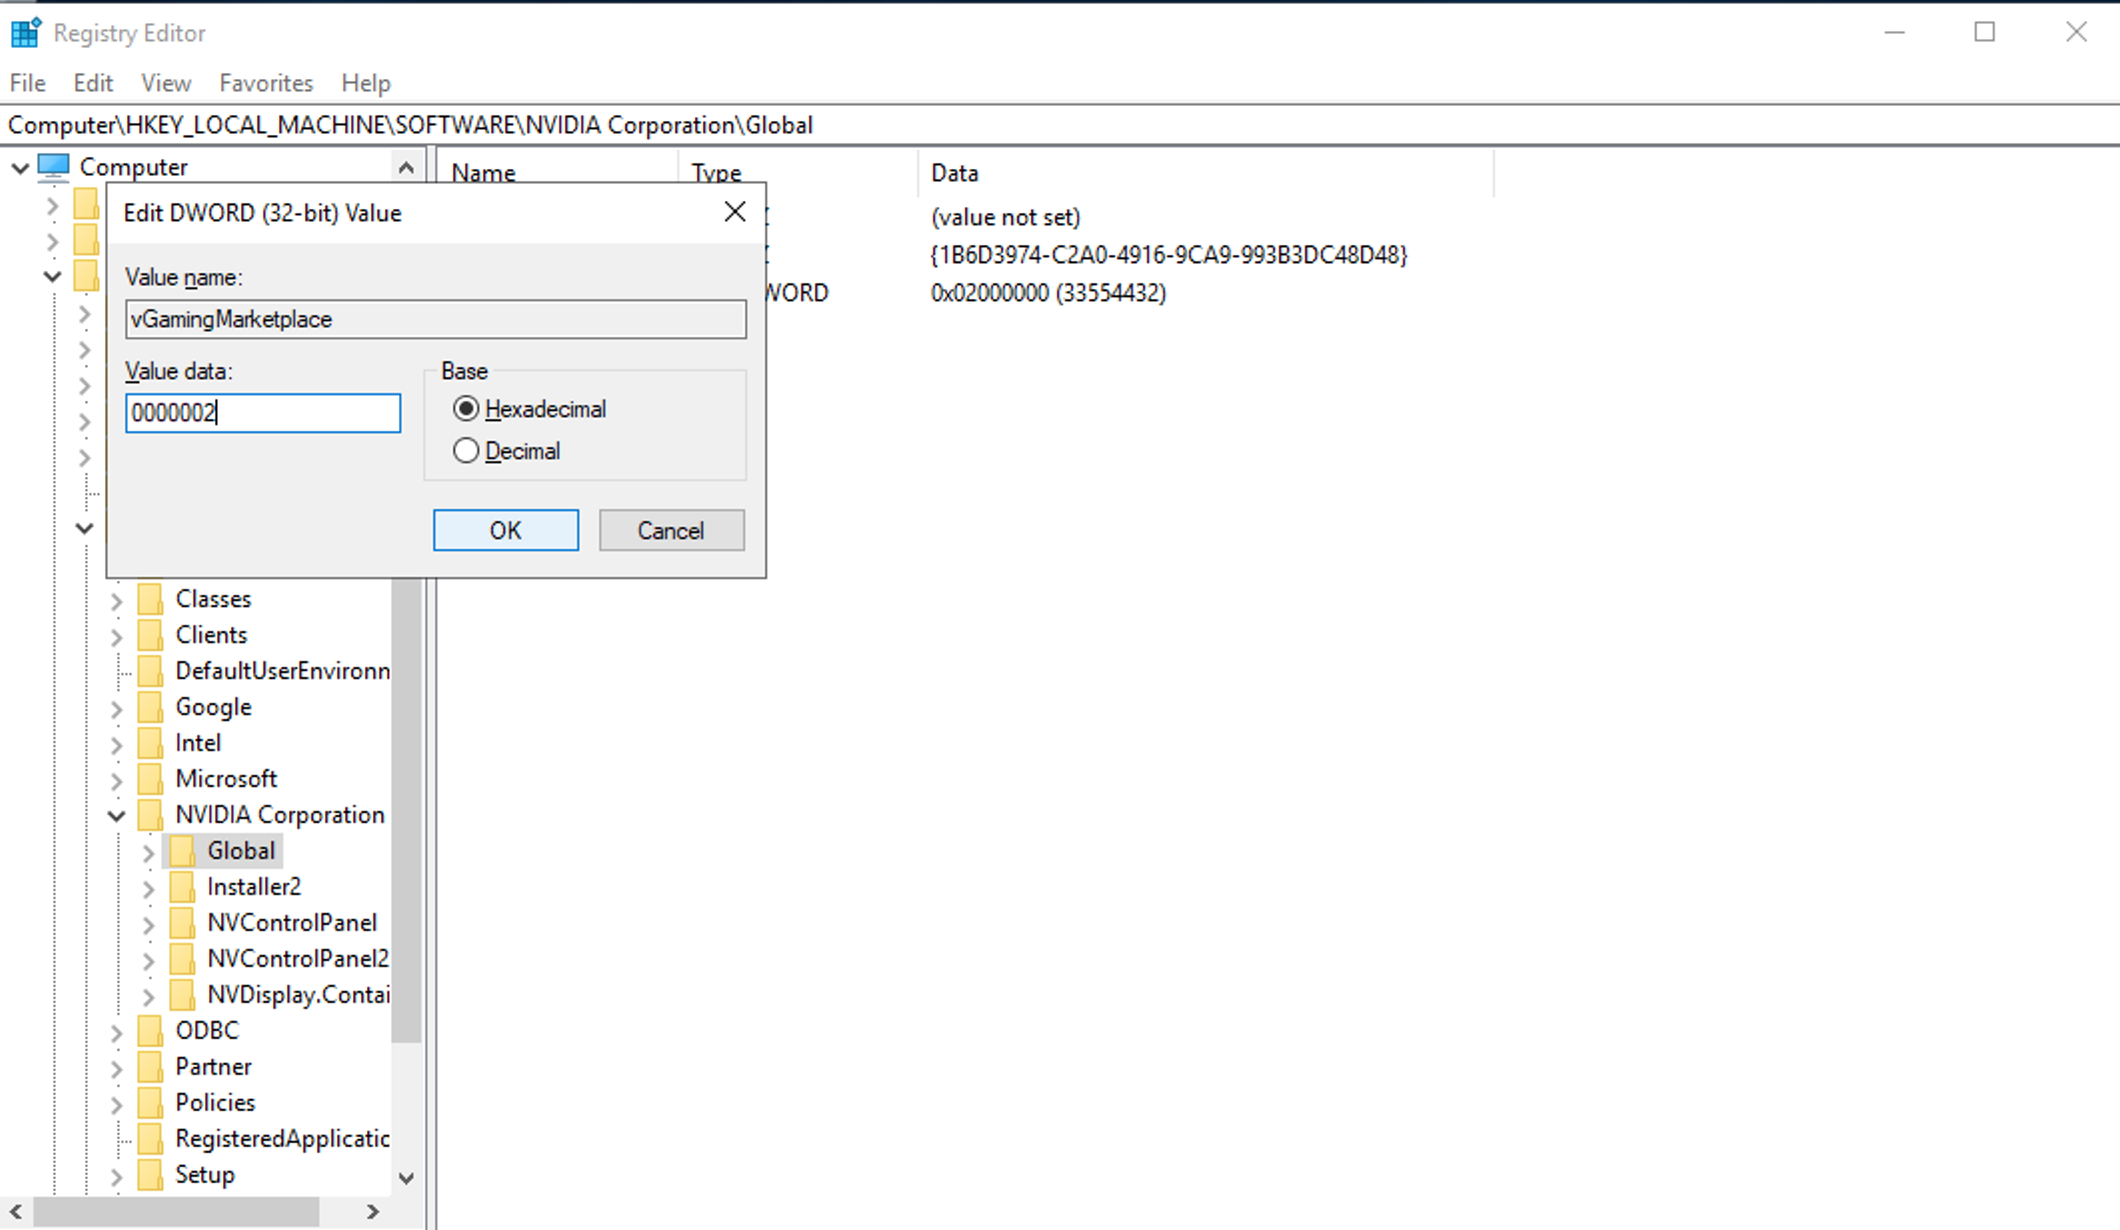
Install Nvidia Graphics Drivers, GRID drivers
Following the AWS Guide, download the Nvidia graphics drivers and GRID drivers for your G4 machine. (The Nvidia Drivers are for T4 GPUs).
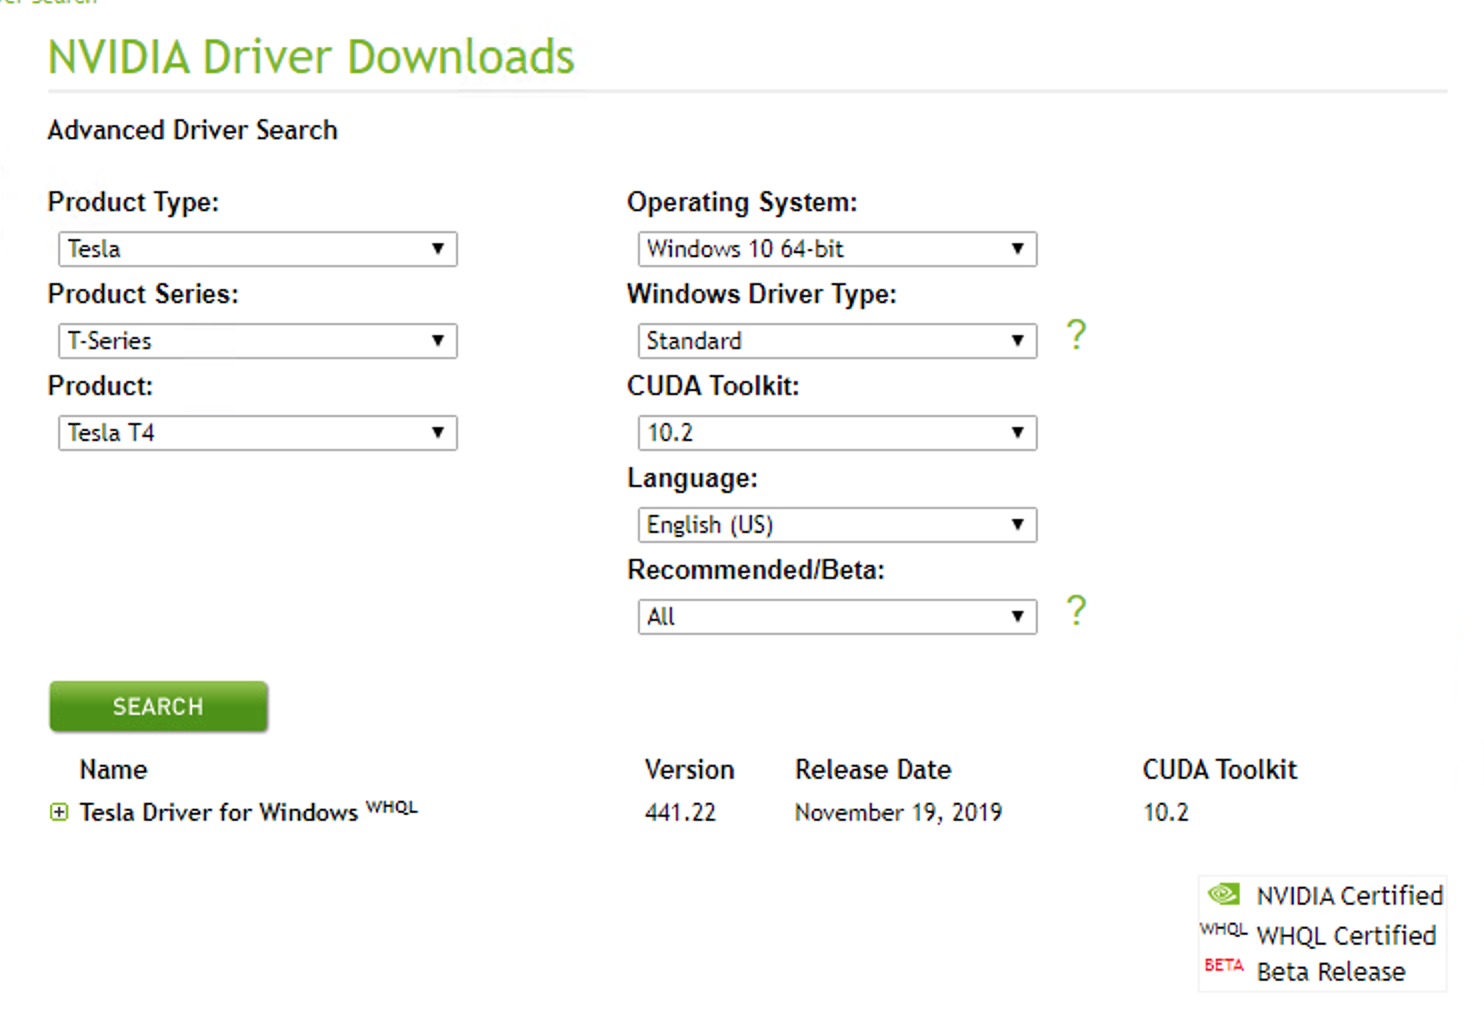
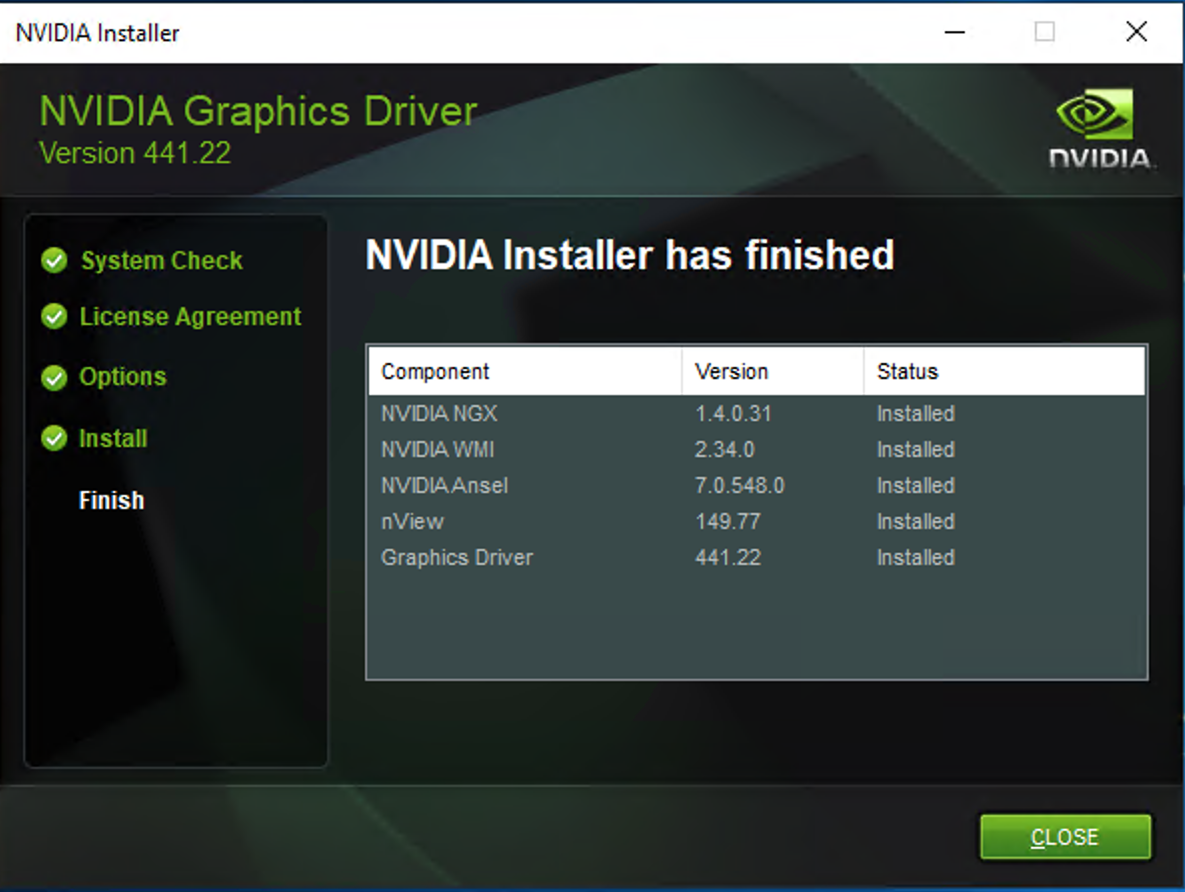
Make sure to also configure the GRID drivers appropriately according the the AWS Guide


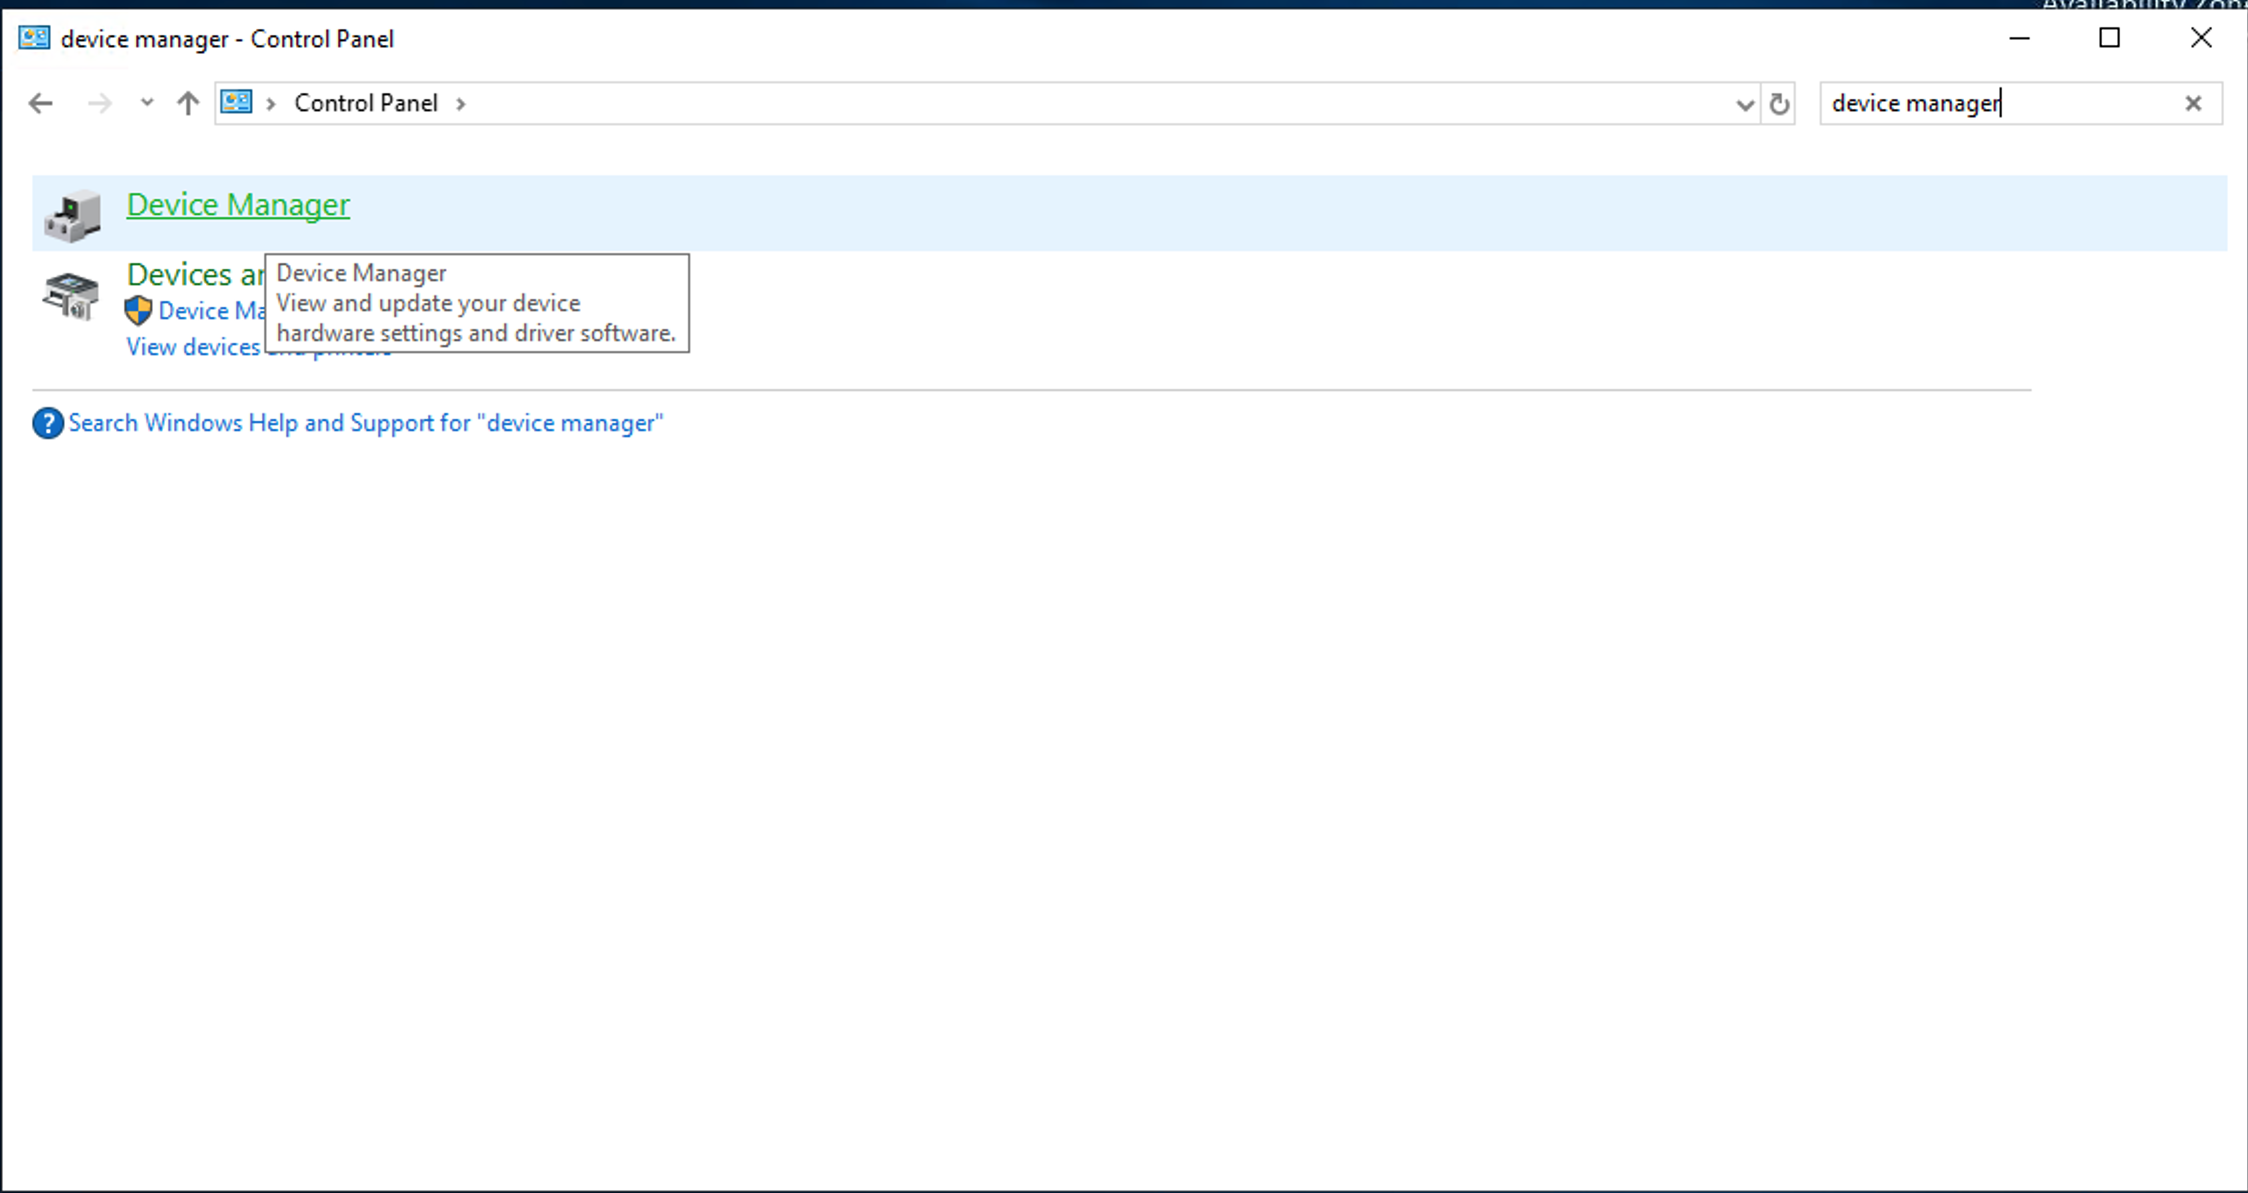
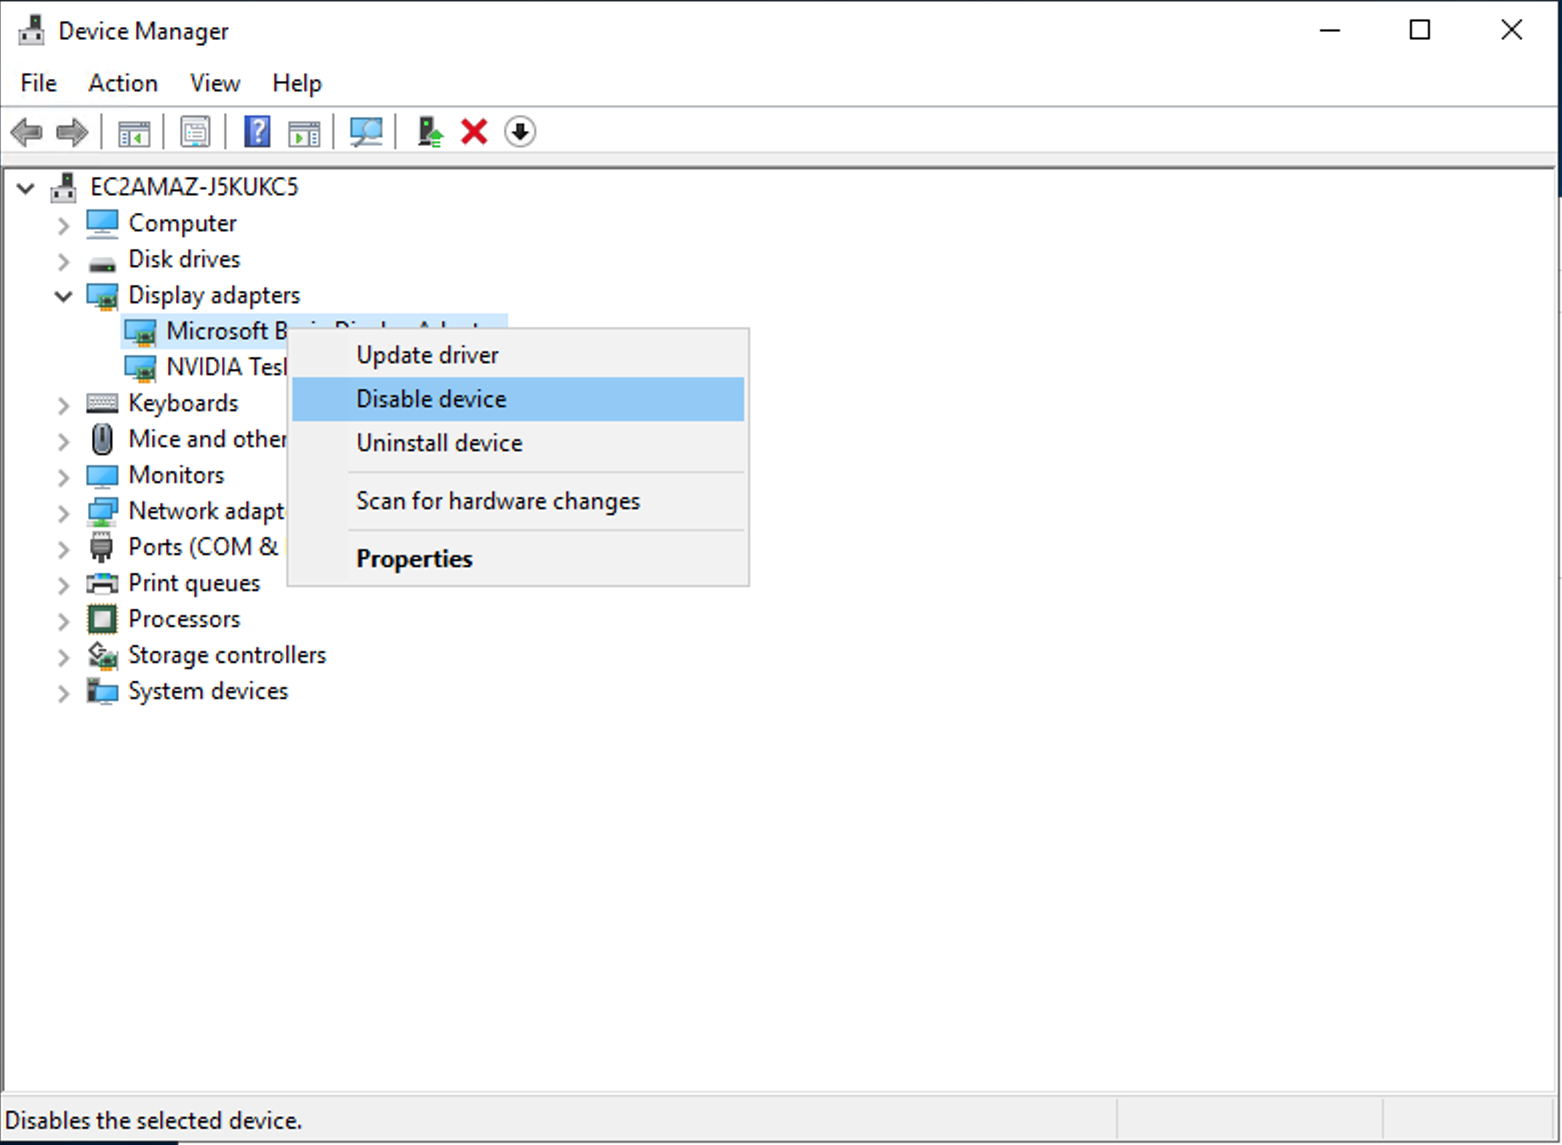
Disable Windows Basic Display Driver and install Windows Features
Before restarting the VM, configure and install some windows settings and features. First, disable the windows basic display driver via device manager.

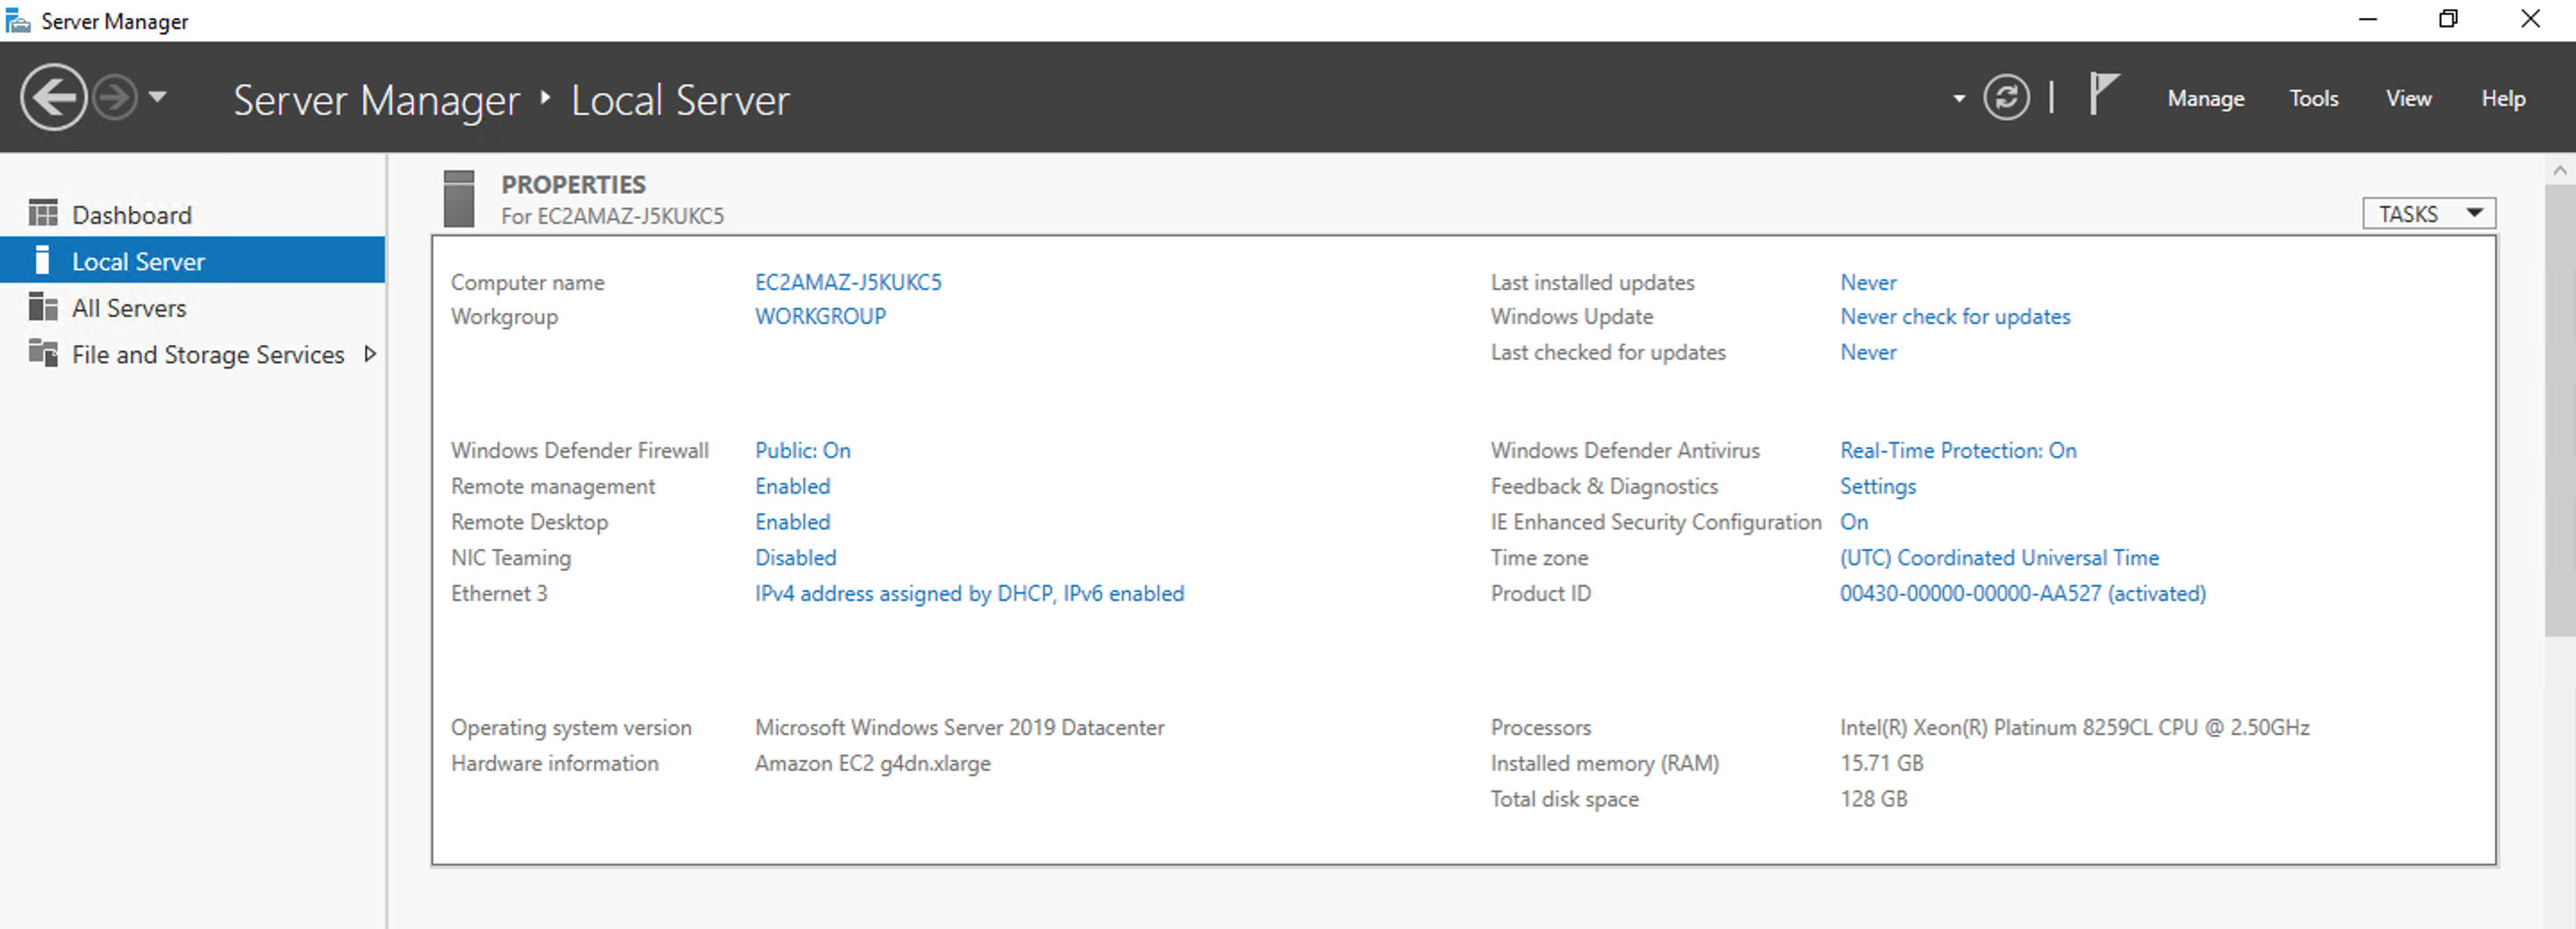
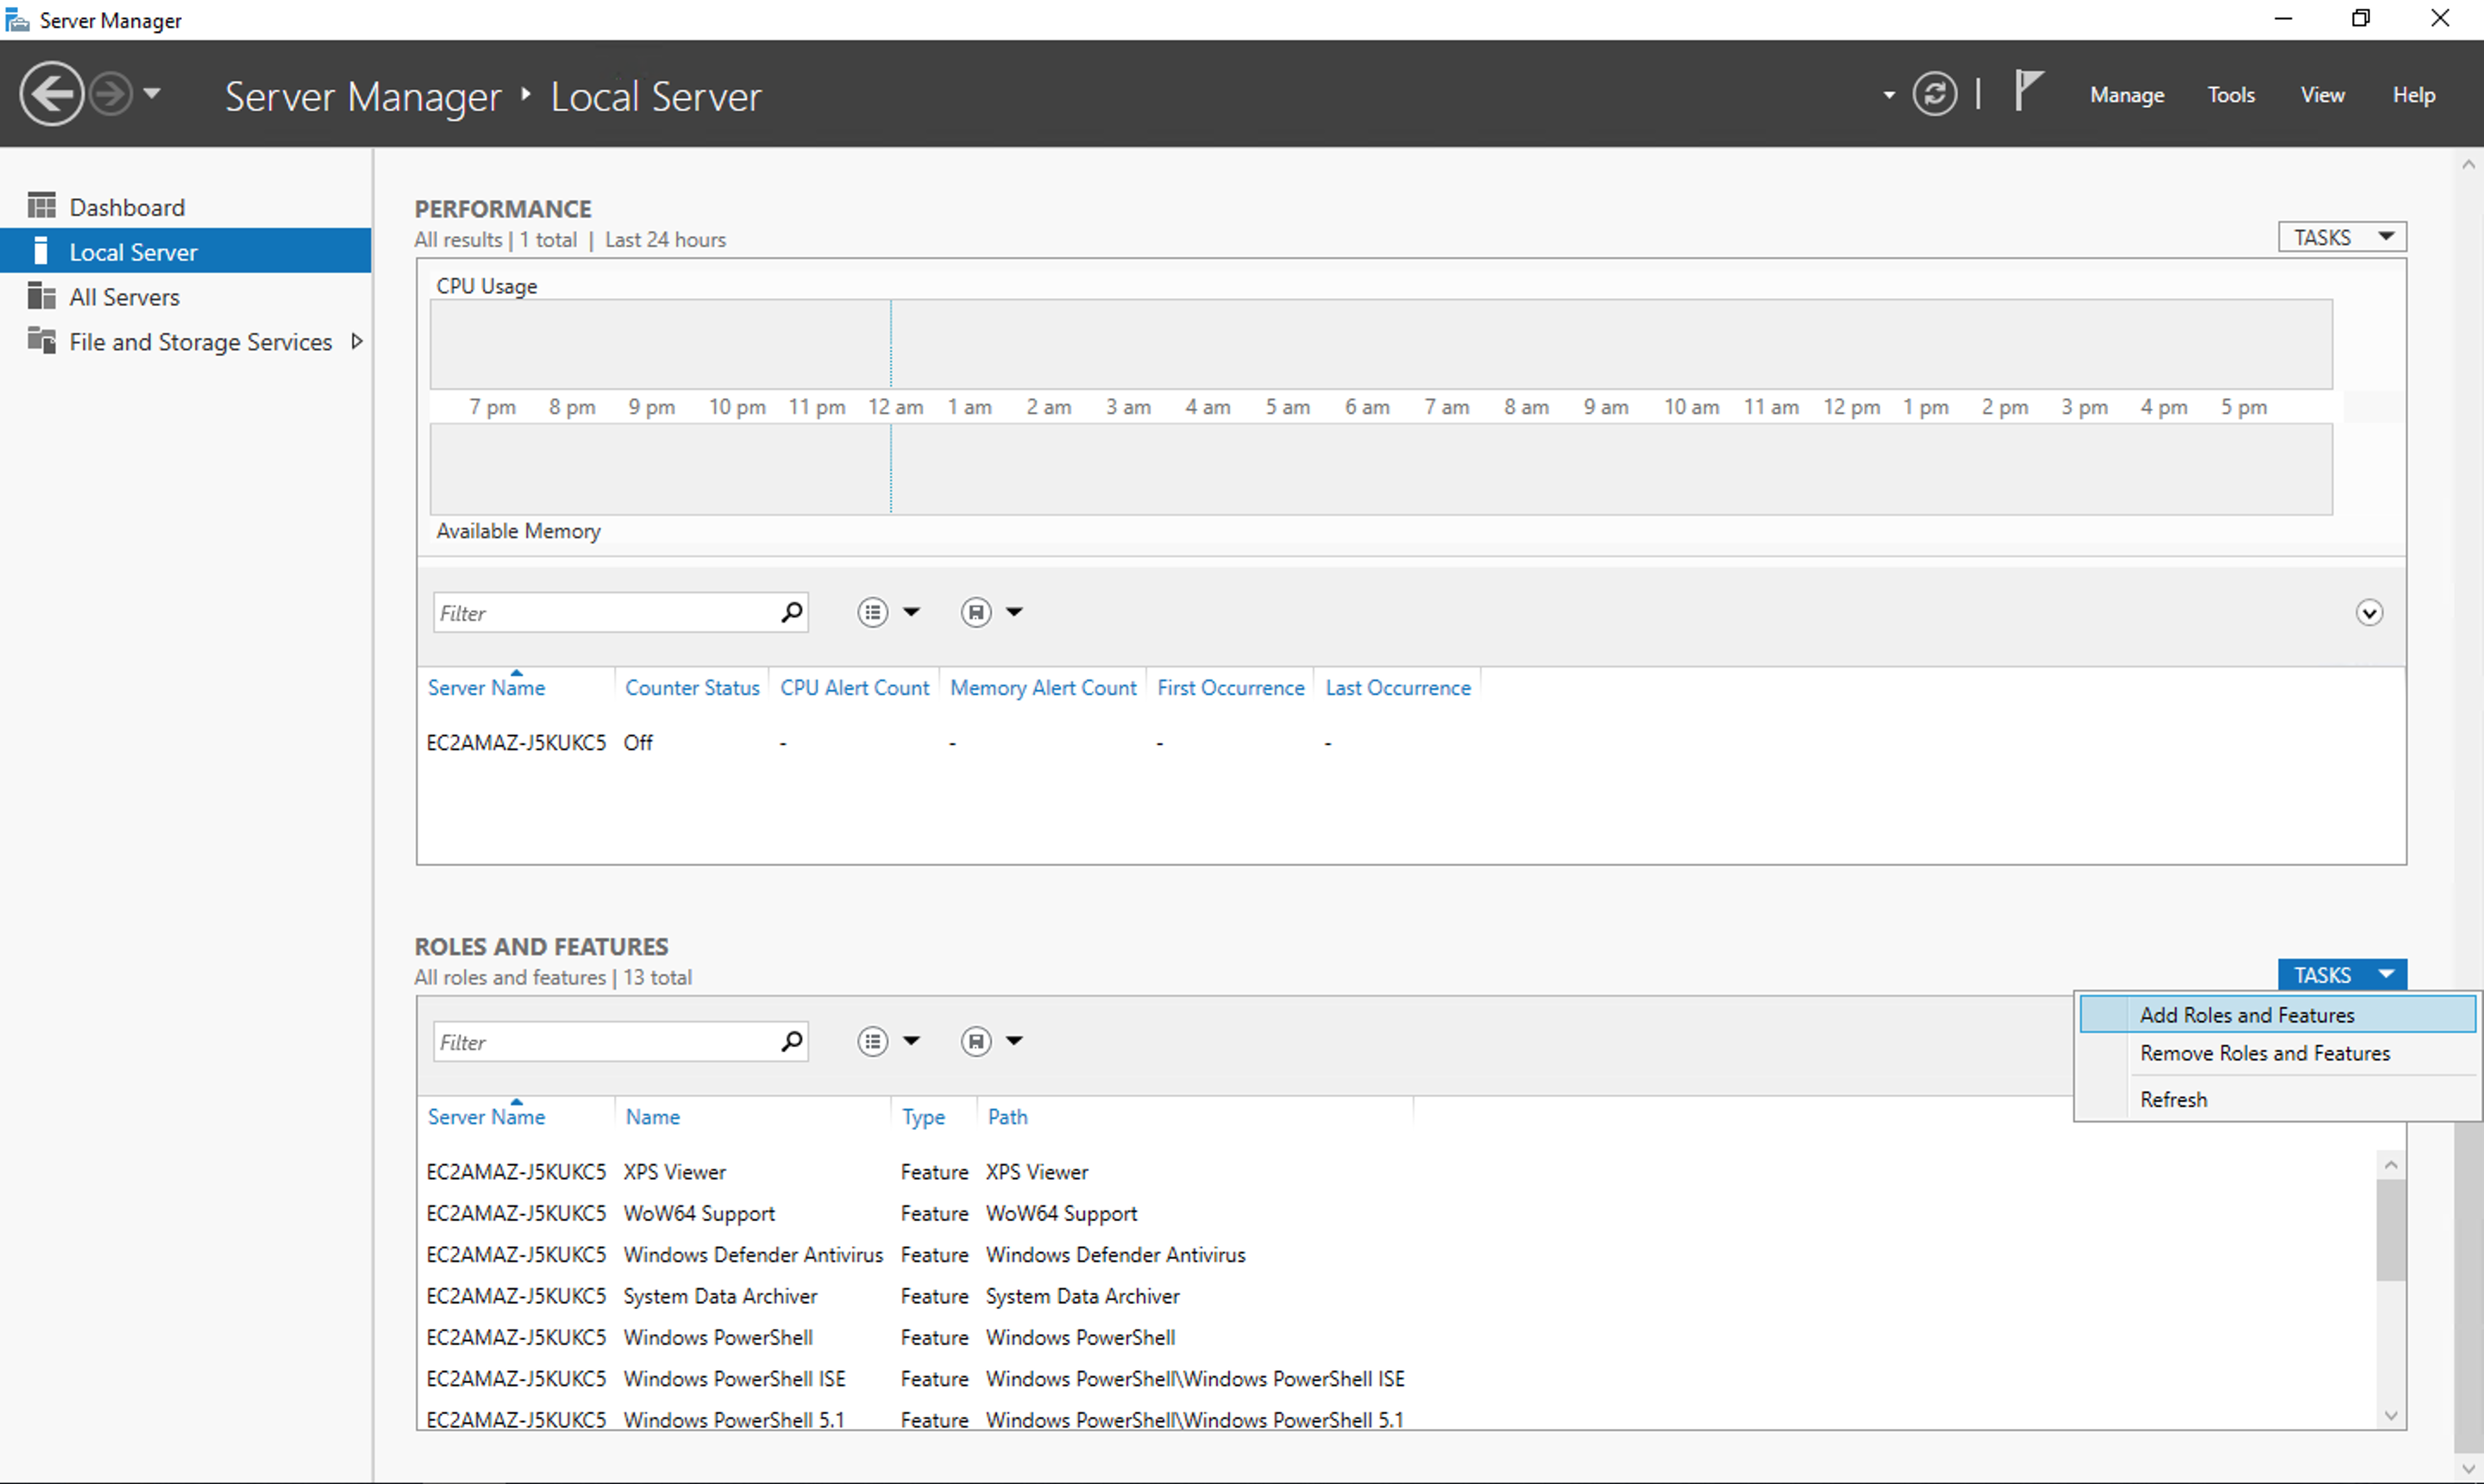
Then install some required Windows Features from Server Manager. Specifically after opening Server Manager, you want to use “Local Server”, and scroll all the way to the bottom to get to the “Roles and Features” section. In “Tasks”, you’ll get a button to “Add Roles and Features”.
You want to add at least Media Foundation, QWAVE (Quality Windows Audio Video Experience), and .NET 3.5.

While you’re installing these features, make sure to also disable Windows Firewall so that you can accept incoming connections on the ports we’ve opened for Steam.
Once you’ve installed all the required drivers and Windows Features, restart the VM before proceeding to the next section.
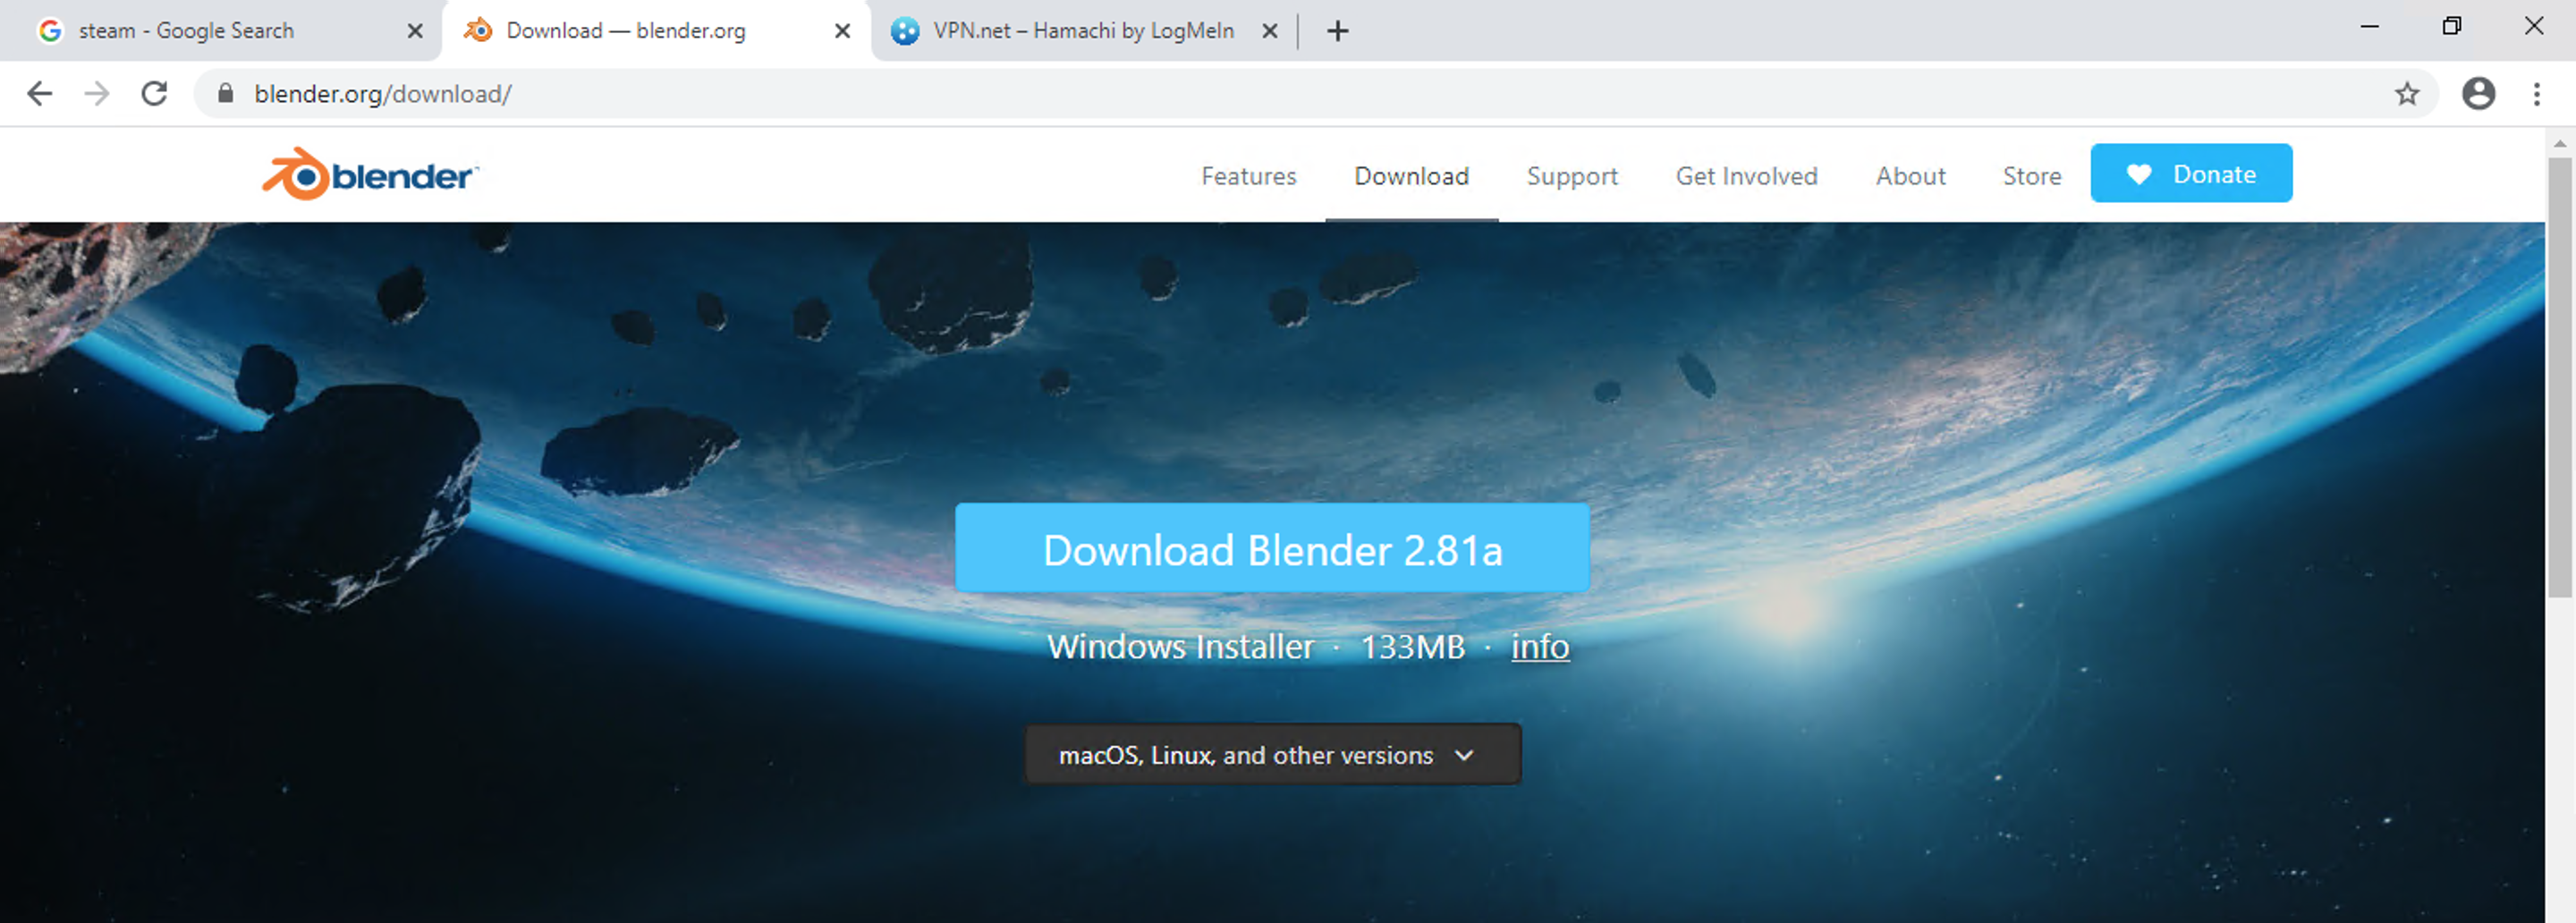
Download Steam, Hamachi, Blender, Razer Sound 7.1
Download and Install Steam, Hamachi, Blender, and Razer Sound 7.1. Note that you only need to install Razer Sound, you don’t need to log in (this is to provide audio drivers).
Login to the same Steam account on your VM and on your client. Also for Hamachi, make sure that your VM and Client are connected to the same VPN group.
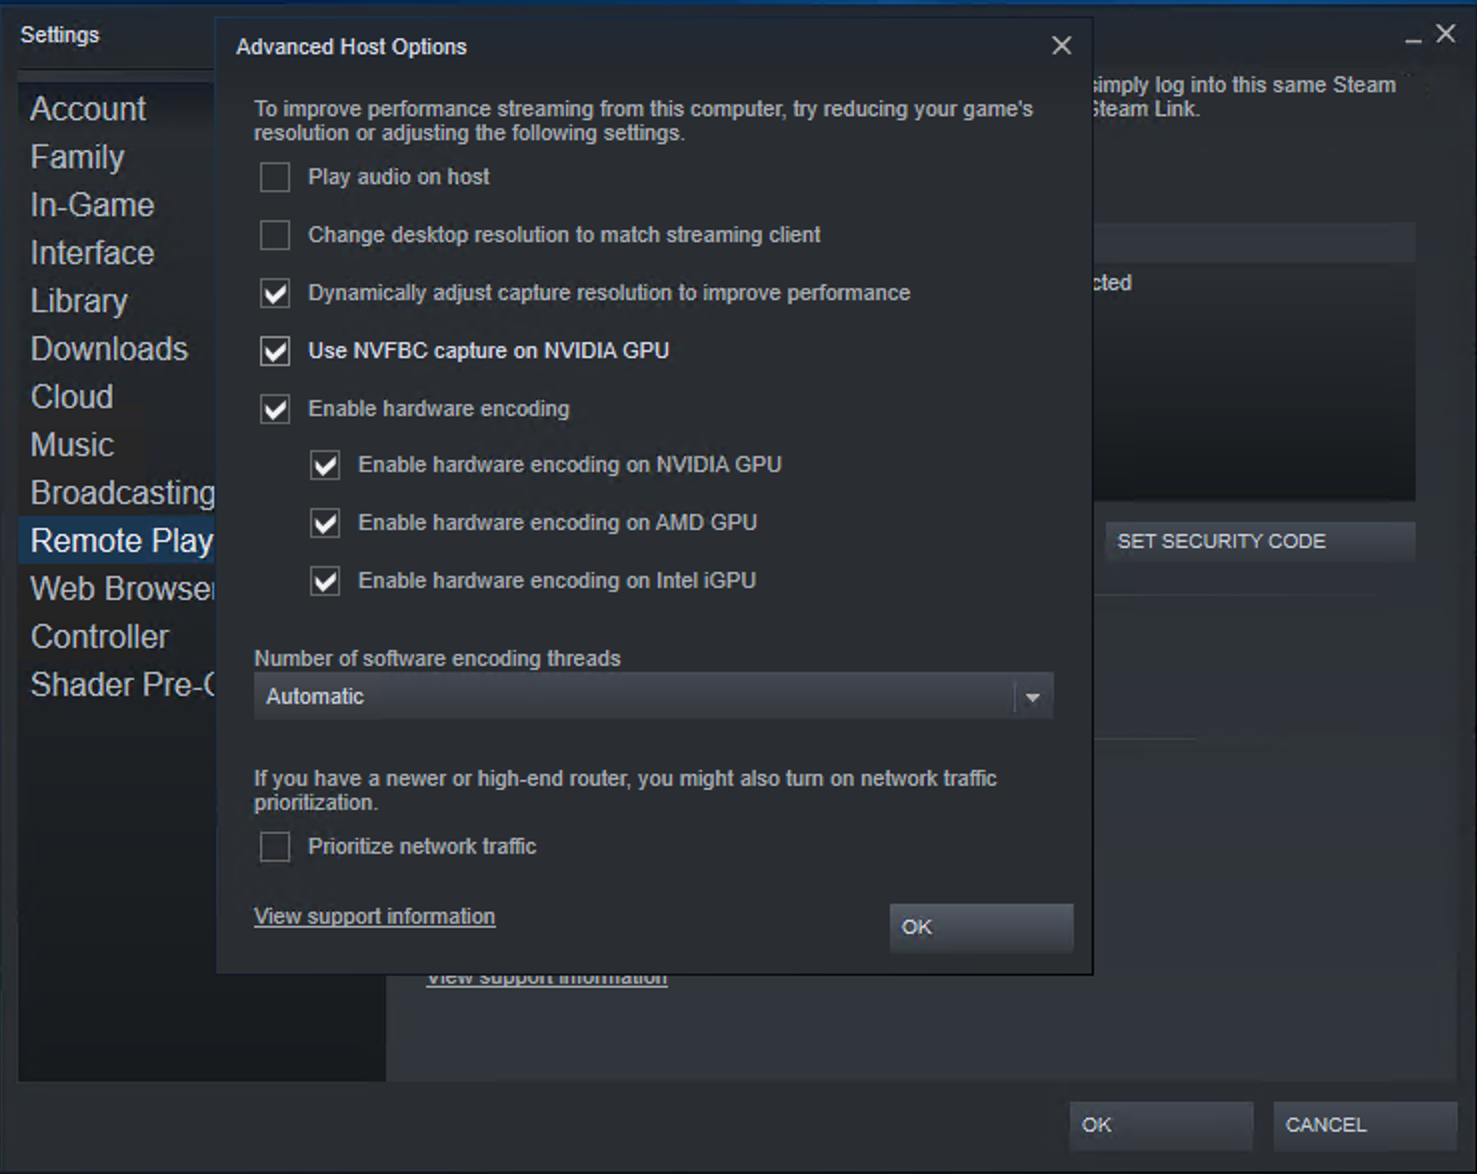
Steam settings for Remote play on host
When logged into Steam on the remote VM, go to Steam Settings -> Remote Play -> Advanced Host Options.
Disable “Dynamically adjust screen capture” and “Use NVFBC capture on NVIDIA GPU” if you have issues with games crashing on startup.
Install Steam Games you want to play
Install the steam games you want to play on the Remote VM. Once they’re installed and you have Hamachi setup, you should be able to see on your client(s) the Steam “Play”/“Install” button become a “Stream” button. Before clicking “Stream”, you’ll need to create a logout.bat file below and disconnect from Remote Desktop (RDP).
Create logout.bat
Create logout.bat that will log out of remote desktop, but keep Hamachi running (needed since Steam Link crashes while still connected to RDP).
The logout.bat batch script should have the following code:
# This script locks the server, disconnects you from the servers RDP session
# sending the session back to console so hamachi does not get disconnected

tscon 0 /dest:console
tscon 1 /dest:console
tscon 2 /dest:console
Rundll32.exe User32.dll,LockWorkStation
Then connect via Steam Streaming when RDP isn’t connected. Apparently Steam uses the same connection or something and errors out. Note that you need to ensure that you have a good connection to the server.
Now you can stream games with steam and profit!
Remote Workspace
Optional:
- Since this is a full fledged remote workspace, you can download and use other GPU based tools (Blender, Maya, Photoshop) via RDP - although lag may be more noticeable through RDP and it might be better to do local development and use the remote server for rendering or when you need more compute.
- This is also a fully useable Windows Environment if you need to test windows specific features or use Windows only tools.
References
- https://lg.io/2015/07/05/revised-and-much-faster-run-your-own-highend-cloud-gaming-service-on-ec2.html - Primarily used this and adapted for Windows Server 2019 and newer Nvidia drivers
- https://docs.aws.amazon.com/AWSEC2/latest/WindowsGuide/install-nvidia-driver-windows.html#nvidia-grid-g4 - Main AWS Documentation Page for installing windows drivers
- https://steamcommunity.com/groups/homestream/discussions/0/1318835718943402340/ - Fixing some steam link settings
- Apparently Parsec was following a similar guide (just automated): https://github.com/jamesstringerparsec/Parsec-Cloud-Preparation-Tool/blob/master/PostInstall/PostInstall.ps1